I decided to challenge myself to developing a few smallish apps. Being British, one of the first thoughts that comes to mind is the weather. Whatever the situation, you can always count on the weather to provide ice-breaking conversation, or a shared sense of joy, or despair, or perhaps even wonder. The lattermost, typically, is when we see snow fall for 10 minutes.

So, now I have broken the ice with my introduction, let’s move on.

Initial concept

The idea was simple: Input a town name and receive a weather forecast. The sort of thing you get in any smartphone app or weather website these days.  But I wanted to limit my scope to the UK. As it happens, I had to limit it a bit further (to exclude Northern Ireland) – which I’ll cover shortly.

For this, I needed:

  • A source of location (i.e. town, city) names across the UK
  • Some reference coordinates for them
  • A way to request a weather forecast from “an online service somewhere”, using those coordinates
  • Some way of displaying those results in a nice way to the user

First wins … and losses

Luckily, Ordnance Survey is an organisation in the UK which provides the country’s official map data. If anyone has a list of town names, it’s them.  And so they do. Along with a number of other services, they provide one called OS Open Names, which provides exactly what I needed. At least, that’s what I thought.

Once I started dealing with the data, it became clear that it wasn’t quite what I was looking for.

While the data format (plain text, CSV) was ideal, what I hadn’t factored in was that OS grid references have very little to do with Lat/Long coordinates.  As I’m sure you will be aware, Latitude (north-south position) and Longitude (east-west position) allow a simple, two-number reference for any position on Earth.  Lat/Long coordinates are the basis of most weather data API lookups, and I had made the assumption that OS data would provide that. Alas, it doesn’t.

As I also discovered, the data only covered mainland Britain (Scotland, England and Wales) and not Northern Ireland. So, we have here a GB-based system, not a UK one.

OS location data file set

Rationalising the data

Coming back to the data itself, some filtering and optimising was essential to make this tool usable. The search list of towns and cities needed to be as small as possible.

The initial dataset (downloaded data from OS), when uncompressed, is 1.7GB, comprising approximately) 3.04 million rows of data.

By just cutting columns, I reduced dataset to 151MB – which was much more agreeable. However, this dataset still contained superfluous rows. The OS data includes road names, numbered roads, coastal points of interest, postcodes… basically a lot of stuff that isn’t town and city names, which were to be my only search criteria.

Further reducing data by removing rows that weren’t of “populatedPlace” type reduced searchable data further, down to 2.8MB (now only 43,254 rows). This was great, but due to the oddities of searching for Lat/Long coordinates using the OS grid reference, a little data had to be added back.


A problem with location references

The issue I came across was that the National Grid system uses references which are comprised of three parts: a 2 letter code, a 5 digit code and another 5 digit code.  The supplied data only provides two 6-digit numeric codes, not the two-letter prefix.

Looking at the source data files, I had a hunch that the two letter prefix I needed. My hunch proved correct, although I still haven’t found official documentation declaring this.

Terminal showing places with "Chester" in the name

The filename being the only source of search prefix was workable, though: in each row of place name data, I appended the filename. I would use the first two letters of thatt field for my grid location reference.

But what about the numeric digits? I had two sets of 6 digits, and the examples given cited two sets of 5 digits! Luckily, our beloved ramblers came to the rescue! I found a web page that explained the OS grid reference system in easy enough terms that a luddite like me could understand.

The solution was to simply use the least significant 5 digits (the 5 on the right of the number).  I then had a reference I could work with, using the OSGridConverter library that is available in Python.

A rudimentary UI

To interact with the dataset, a very simple prompt was needed. For that, I just allowed the user to nominate a place from a list, if the result list was greater than one result.

Within the terminal, a search for “Chester” results in 50 places with Chester in the name. The prompt allows the user to select one.

Coordinate & weather lookups

Converting OS grid refs to Lat/Long coords was made so much simpler with the OSGridConverter library. Once a result was returned, the final step was perform a weather lookup for those coordinates.

Fortuniately, another win was the meterological forecast lookup. Open-Meteo provided the API lookup code, in Python, ready to go. All that was needed was to plug in my own Lat/Long coordinates, perform the query and show the result.

The API query focuses on temperature, which seemed a more upbeat query than precipitation.

Despite calling this mini-app “RainyDaze”, I like how it can be easily adjusted to displaying any type of forecasteable data.  I could expand upon this by prettifying the output, but at this point that’s just cosmetic; the core is now built.

Repo

You can browse the code and do whatever you want with it, starting here: https://github.com/stevedowe/rainydaze/

WordPress / JetPack makes it easy to share posts to social networks. Not sure I’m seeing much benefit in sharing to some of them, the stalwarts in particular (Facebook, LinkedIn, Insta, Tumblr).

Those silos have enough else going on, and I’m not really interested in traction there. Mastodon and Bluesky I’ll keep, for now.

Emacs start page, with GNU image

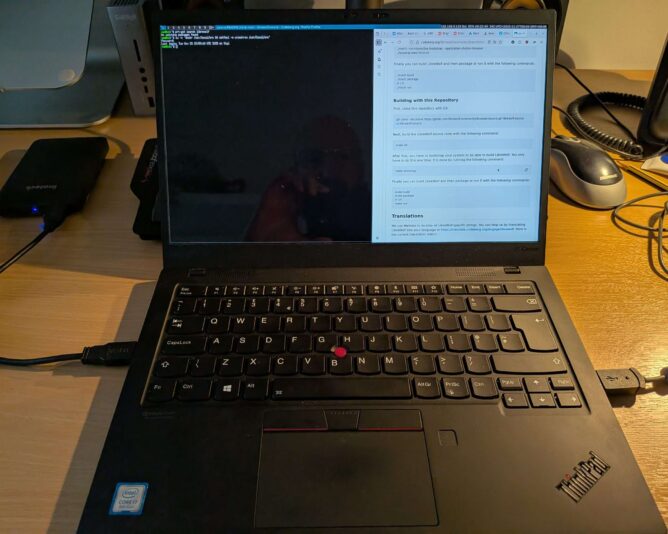
CRUX is a minimalistic GNU/Linux environment, but you still need software to do your job, right? I am all for minimising the software footprint on any machine I manage. It’s better for performance and security, not to mention there simply being less to keep track of.

One piece of software I rely on is GNU Emacs. No, it’s not as minimalistic as vim, out of the box, but I believe in using the right tool for the job. I use Orgmode, mu4e, Emacs diary and other tools to manage my day. Emacs brings it all together nicely, and I’m ok with using both text editors.

However, scaffolding that is provided with any standard Linux distro, when you install emacs, is not present in CRUX. This is an unstructured journey of my attempts to get it working, and the purpose of this post is really for my record, in case I want to create an Emacs package for CRUX that automates (to a degree) the process below.

Install Emacs!

  1. Download latest Emacs tar from gnu.org
  2. (optionally, but recommended) download GNU Mailutils
  3. First install p11-kit, gnutls (# prt-get depinst p11-kit gnutls)
  4. ./configure; make; make install; (mailutils)
  5. ./configure; make; make install; (emacs)

And then… to support mu4e…

  1. Download mu ($ git clone https://github.com/djcb/mu.git)
  2. Install Xapian, GMIME and GLib (prt-get install glib gmime3 xapian-core)
  3. ./configure …  Oh. No w3m, which I use from time to time. Let’s get that.

w3m

Go to Sourceforge:

  1. https://sourceforge.ne./configuret/projects/w3m/
  2. Download latest, uncompress, cd into dir
  3. ./configure  Oh. No gc library.

Ok, search for that:

  1. $ prt-get search gc
    boehm-gc
    gcab
    gcc
  2. A-ha! boehm-gc is what we need. Install it!
  3. # prt-get install boehm-gc

Done! Back to building w3m:

  1. ./configure
  2. make … Oh boy, that just doesn’t work with modern gcc. Errors everywhere.
  3. Remove (require 'w3m-search) from Emacs’ init.el. Perhaps I can live without w3m..? /sniff

Running Emacs

Emacs runs! mu4e doesn’t! error in process sentinel: mu server process ended with exit code 1

Bah! The Xapian mail database was not copied across from old drive.

cp -aurv /mnt/olddrive/home/.cache/mu ~/.cache/

Yay! mu4e runs! Drat! mbsync doesn’t!

$ prt-get search mbsync;
No matching packages found

What about the “new” name for mbsync, “isync”?

$ prt-get search isync
isync

Hurrah! Let’s install it!

# prt-get install isync

Still doesn’t work. Of course .. credential handling. Thinking…

Do I need askpass..? I can’t quite recall… Let’s check it out.

$ prt-get search askpass
No matching packages found

For some reason ssh-askpass has been omitted from the Xorg base install. I’ll come back to this…

Password & encryption handling

I also need GNU pass. This is a great tool for storing passwords in a safe, clean, hierarchical and Unix-like manner. To support pass, a few dependencies must be met, so:

# prt-get install xclip tree qrencode

Then:

  1. git clone https://git.zx2c4.com/password-store
  2. cd password-store
  3. (as root) make install

Sidenote! It turns out that password-store is actually provided in a standard CRUX repo. So, in time, I’ll remove this and just install the standard package.

After all of this, I still had a fundamental problem: gpg --list-keys did not list my keys, and instead showed a single key under the heading [keyboxd]

I found, from RTFM here, the following:

common.conf

This is an optional configuration file read by gpg on startup. It may contain options pertaining to all components of GnuPG. Its current main use is for the “use-keyboxd” option. If the default home directory ~/.gnupg does not exist, GnuPG creates this directory and a common.conf file with “use-keyboxd”.

I checked my ~/.gnupg directory and, sure enough, there was common.conf with that one entry in it.  Checking my old drive’s .gnupg directory showed that this did not exist, which is why I didn’t have this problem previously. I simply moved that file aside (renaming it to common.conf.bak) and hey, presto! No more weirdness around key listings. (The reason for it being there on the new drive, by the way, was that I’d probably invoked gpg before copying my old config over, so the default config with that was installed for me. As a convenience, obviously!)

Circling back

To use that horrible business buzzword, I need to come back to GNUPG and/or a smartcard daemon. The issue is that while my main GPG key is stored on disk, my sub-keys for encryption/decryption, signing and authorisation are stored on a Yubikey. In order to unlock my GPG-encrypted password, stored using pass, I need my Yubikey plugged in and available to GPG.

However, what I thought was askpass was actually pinentry. It’s all coming back to me now! Luckily for me, pinentry is provided by the CRUX team, so it’s a simple

# prt-get install pinentry

to get that installed.

One more thing…

There’s always one more thing. My laptop doesn’t seem to recognise that my Yubikey is inserted in a USB port. Ooh. What next?

Well, my guess is that the pinentry program doesn’t have access to the USB device. Time to explore those udev rules, to see if it can be given permission.

However, before I do that, let’s see if a little test proves my theory. The pinentry prompt appears with:

Please insert the card with serial number:

7 654 321

A quick look at dmesg shows me that the card is picking up device node usb 1-4.2.2:

[ 2843.676542] usb 1-4.2.2: new full-speed USB device number 8 using xhci_hcd
[ 2843.761542] usb 1-4.2.2: New USB device found, idVendor=1050, idProduct=0407, bcdDevice= 4.33
[ 2843.761546] usb 1-4.2.2: New USB device strings: Mfr=1, Product=2, SerialNumber=0
[ 2843.761547] usb 1-4.2.2: Product: Yubikey 4 OTP+U2F+CCID

Maybe, if I just give that device permission for my user to read, it might work..?

As it was the last device plugged in, and looks like it’s registering as a, HID device, I suspect it’s /dev/hidraw4

The timestamp on /dev/hidraw4 also roughly corresponds to when I plugged it in to the machine (a theory I can easily test if this doesn’t work), so I’m ok with testing this out.

# setfacl -m u:myID:r

And… drumroll, it didn’t work!

I can see now that getting udev to do this makes total sense. Besides, I don’t actually think it’s the HID device I want to address, specifically, because an HID device is a “human interface device”, which really only corresponds to the touch-sensitive button on the key.

Anyway, that aside, there’s helpful documentation on adding two (1, 2) udev rules for yubikeys. Nevertheless, even after issuing:

# udevadm control --reload

… no change occurred in terms of USB device access.

Now two more things

When running

$ gpg --card-status --debug-all

it becomes clear that the blocker is not having a smartcard daemon running – or, at least – one that isn’t accessible to gpg.

gpg: DBG: chan_3 -> SCD GETINFO version
gpg: DBG: chan_3 <- D 2.5.14
gpg: DBG: chan_3 <- OK
gpg: DBG: chan_3 -> SCD SERIALNO
gpg: DBG: chan_3 <- ERR 100663614 Service is not running <SCD>
gpg: selecting card failed: Service is not running
gpg: OpenPGP card not available: Service is not running

It so happens that pcscd is actually running on the machine and, usefully, it spits out its contempt straight into the syslog:

Dec 3 16:01:16 x1 pcscd: ../pcsc-lite-2.4.0/src/auth.c:166:IsClientAuthorized() Process 11443 (user: 1000) is NOT authorized for action: access_pcsc
Dec 3 16:01:16 x1 pcscd: ../pcsc-lite-2.4.0/src/winscard_svc.c:357:ContextThread() Rejected unauthorized PC/SC client

This tells us something useful, which is that GPG is trying to access a smartcard daemon service and is being rejected. So we can probably discount gpg being “guilty” of some kind of misconfiguration.

The question then, is how does a user become “authorised for action: access_pcsc”?

Well, it turns out, you don’t necessarily need to. To start with, I had no such problem when running gpg --card-status as root, which led me initially to a permission-related issue. However, on reflection, it seemed more liekly to me that as there was no smartcard daemon running, it was likely that this needed to be addressed first. It also aligned with the error message GPG was issuing.

Using pcscd

pcscd is a trim, yet fully functional smartcard daemon that is compatible with all sorts of cards and readers. Its documentation steers you towards /usr/lib/pcsc/drivers as a location to find the driver for your smartcard of choice. Except, on CRUX, this directory doesn’t exist. Does this matter? It seems not.

The more important thing, to GPG, is that it is able to interface to a smartcard daemon that’s running – and, more specifically, one running as root.

So, those lines from GPG?

gpg: selecting card failed: Service is not running 
gpg: OpenPGP card not available: Service is not running

It’s wise not to overthink this. If GPG is looking for a smartcard service (daemon) and one does not exist, it will complain! So, as pcscd in CRUX didn’t come with a service file, I decided to create one using another as a template. My criteria was simple: find the file with the simplest implementation – which you can judge based on the number of lines in the service definition:

$ wc -l /etc/rc.d/* 
26 alsa
36 crond
43 dbus
36 dhcpcd
39 gitd
35 inetd
24 lo
48 net
33 nfs
25 nfsclient
36 nfsdcld
38 nfsserver
54 nftables
36 rpc.idmapd
36 rpc.mountd
35 rpc.nfsd
37 rpc.statd
38 rpcbind
36 rsyncd
50 sshd
36 sysklogd
28 wlan
39 wpa_supplicant
23 xdm
890 total

xdm looked like a good candidate, so I copied the file and created a file called pcscd, with the following contents:

#!/bin/sh
#
# /etc/rc.d/pcscd: start/stop pcscd
#

case $1 in
 start)
  /usr/sbin/pcscd
  ;;
 stop)
  killall -q /usr/sbin/pcscd
  ;;
 restart)
  $0 stop
  sleep 2
  $0 start
  ;;
 *)
  echo "usage: $0 [start|stop|restart]"
  ;;
esac

# End of file

The only other requirement is to start this service on boot, which is easily achieved by adding pcscd to the SERVICES line in /etc/rc.conf:

SERVICES=(lo wlan crond dbus alsa pcscd)

I also settled on the following configuration for GPG:

$ cat gpg.conf
auto-key-retrieve
no-emit-version
use-agent

$ cat scdaemon.conf
pcsc-driver /usr/lib/libpcsclite.so
card-timeout 5
#disable-ccid
#pcsc-shared

You’ll notice that unlike much advice you’ll read on the web, I didn’t disable ccid. Well, technically I undid my previous disabling of ccid, which didn’t seem to have an adverse effect. I’m of the mind that if the setting doesn’t make any perceptible difference, remove it.

In conclusion

It would be fair to say that I hadn’t expected to spend a whole day on configuring Emacs to work well for me in CRUX. But the effort has been worth it. I now have feature parity with Emacs on Debian 13 – at least for my needs – and I have picked up a lot of useful information along the way. Plus, I have the advantage of my system remaining lean and mean.

Whoever the faint-hearted are, this would not be for them. But as most people are up for trying, and modern computing is an almost zero-risk exercise in experimentation, I hope the above helps the odd soul who is looking for a few pointers on their own journey. For me, having Emacs function in the same way as it does on Debian was an essential criterion for adopting CRUX. That done, I’m now thinking this project is a “go”!

Prepare for confusion…

Standard “nobody” user/group in CRUX:

$ cat /etc/passwd | grep ^no
nobody:x:99:99:nobody:/:


$ cat /etc/group | grep ^no
nobody::99:

Normally (I believe), the group “nogroup” is the corresponding group for the user “nobody”.

Having the group called “nobody” might affect functionality.For instance, slock expects “nogroup” to be the group name. “nogroup” is also the default group name in Devuan, and its ID (65534) also corresponds to the BSD norms. CRUX’s appears to align with Red Hat’s preferred UID/GID (99).

In this example, “nobody” (the user) is also not a member of the “nobody” group. I’m not sure if it should be, or not. I guess not, otherwise you’re giving “nobody” something of an identity by assigning it (them?!) to a group. Again, comparing Devuan, nogroup does not have any members, so this seems normal.

Just the name question, then. I’ll probably put this to the mailing list…

Laptop with suckless environment

I decided to trial CRUX on my laptop. For the uninitiated, CRUX ‘is a lightweight Linux distribution for the x86-64 architecture targeted at experienced Linux users. The primary focus of this distribution is “keep it simple” ‘. (CRUX handbook)

The aims of this exercise are twofold:

  1. Achieve a singular focus on software and system management. I want only the software I want on my laptop to be on my laptop. Nothing more. I don’t need to install games, for example. Sadly, I don’t have time for that.
  2. Take this minimalistic journey to its conclusion, by running a suckless environment. Suckless software (unencrypted link) is ‘the home of quality software such as dwm, dmenu, st and plenty of other tools, with a focus on simplicity, clarity and frugality. Our philosophy is about keeping things simple, minimal and usable.‘ (suckless philosophy)

The combination of CRUX and Suckless software means that a lot of compilation of source code is expected. This is fine – it promotes a journey into better understanding of “the UNIX way” and grasping the concepts behind the shell and userspace more closely.

It’s minimalist, which is what I like. Truth is, like most people, I’m easily distracted. Give me a little stress and I can find many other things to do (like write this blog?!) instead of the work in front of me. Running the most minimalistic computer environment is that my attention has little chance to wander. No distractions. No notifications. Just singular purpose – the tasks to be achieved.

Baby steps

The first step in setting up a CRUX system is installation. Easy, one might say. To some extent this is true: the documentation is written very well; you can tell it has been honed over successive generations into a terse, reasonably compact yet sufficiently detailed tome of guidance on how to set up your machine. Unfortunately, I failed at my first endeavour, and ended up with an unbootable system. The reasons were several:

  • I made a simple, schoolboy error with the syslinux bootloader, naming my kernel image vmlinuz-6.12.23.img. This is incorrect according to the syslinux documentation, as I later discovered. Only initramfs images can have the .img filename extension. Once corrected, the system actually booted but soon ran into another problem.
  • I inadvertently stripped back the kernel too much when compiling it, removing (or not adding) key items like framebuffer support and the intel i915 graphics driver. This made early-boot diagnostics very difficult, because errors would scroll by, off-screen, before I could read and understand them.
  • Furthermore, I stumbled upon a weird situation with dracut/initramfs. When running through the early boot process, it mounted /usr (which was a separate LVM volume on my SSD) into the early-boot environment, but then didn’t unmount it before running switch_root. switch_root is the process that gets executed as a final “handover” to the Linux kernel, allowing it to continue the boot process by providing mounted drives that are ready for init (pid 1) to be executed. Because /usr was mounted, a filesystem check could not be performed on it before mounting, which halted the boot process. I need to re-test this before considering raising a bug report.
  • The combination of the above factors meant that I couldn’t see the fsck issue occurring when starting up the system, and instead was left with a system that (after bootloader issue was resolved), didn’t tell me a lot about why it wasn’t booting. Yuck!

RTFM, again

In case you have stumbled upon this page and think “that sounds like what’s happening to me”, let me point you to the very helpful additional documentation:

This documentation, in addition to the CRUX handbook, got me through. It’s very useful to understand where the rd.* variables live (and why), and what options you have to improving the boot environment to help with early analysis and debugging of your set-up.

Next steps

My bootable CRUX system currently lives on an external SSD, in a USB enclosure. My intention is that once that environment is functionally equivalent to my current Debian 13-based laptop, I’ll do a disk-switch by backing up my laptop image (the whole image, as one file, to another external disk) and then run through the installer one last time, properly setting up the laptop SSD with a new partition table, boot sector and fully-sized luks-encrypted volume that will contain all my data.

Once the basics have been set up, I’ll then boot into a rescue environment and copy verbatim all files from the external USB CRUX drive’s logical volumes to my internal laptop drive’s LVs. It’s slow-going, but a much more measured approach which I have to remind myself is the right way to go, here. (One is perhaps a bit impatient at times … ahem).

I’ll write a follow-up post when getting nearer to the switch over.

Why all this effort?

Like many people, I firmly believe in the following principles:

  • privacy-first computing: that you should opt to share any data from your computer, to any person or organisation. Not have to “opt out” (how can you opt out if you never opted in, I wonder?!)
  • digital-minimalism: install and run the software you need, and that’s it
  • learning-focused: create an environment that cultivates and encourages learning. Avoid the temptation of environments that “just work”.
  • community-powered: this is a way I can contribute back to the community of developers and creators whose hard work provides me with the freedom of choice.

Life is too short not to align with your values. That’s the CRUX of it.