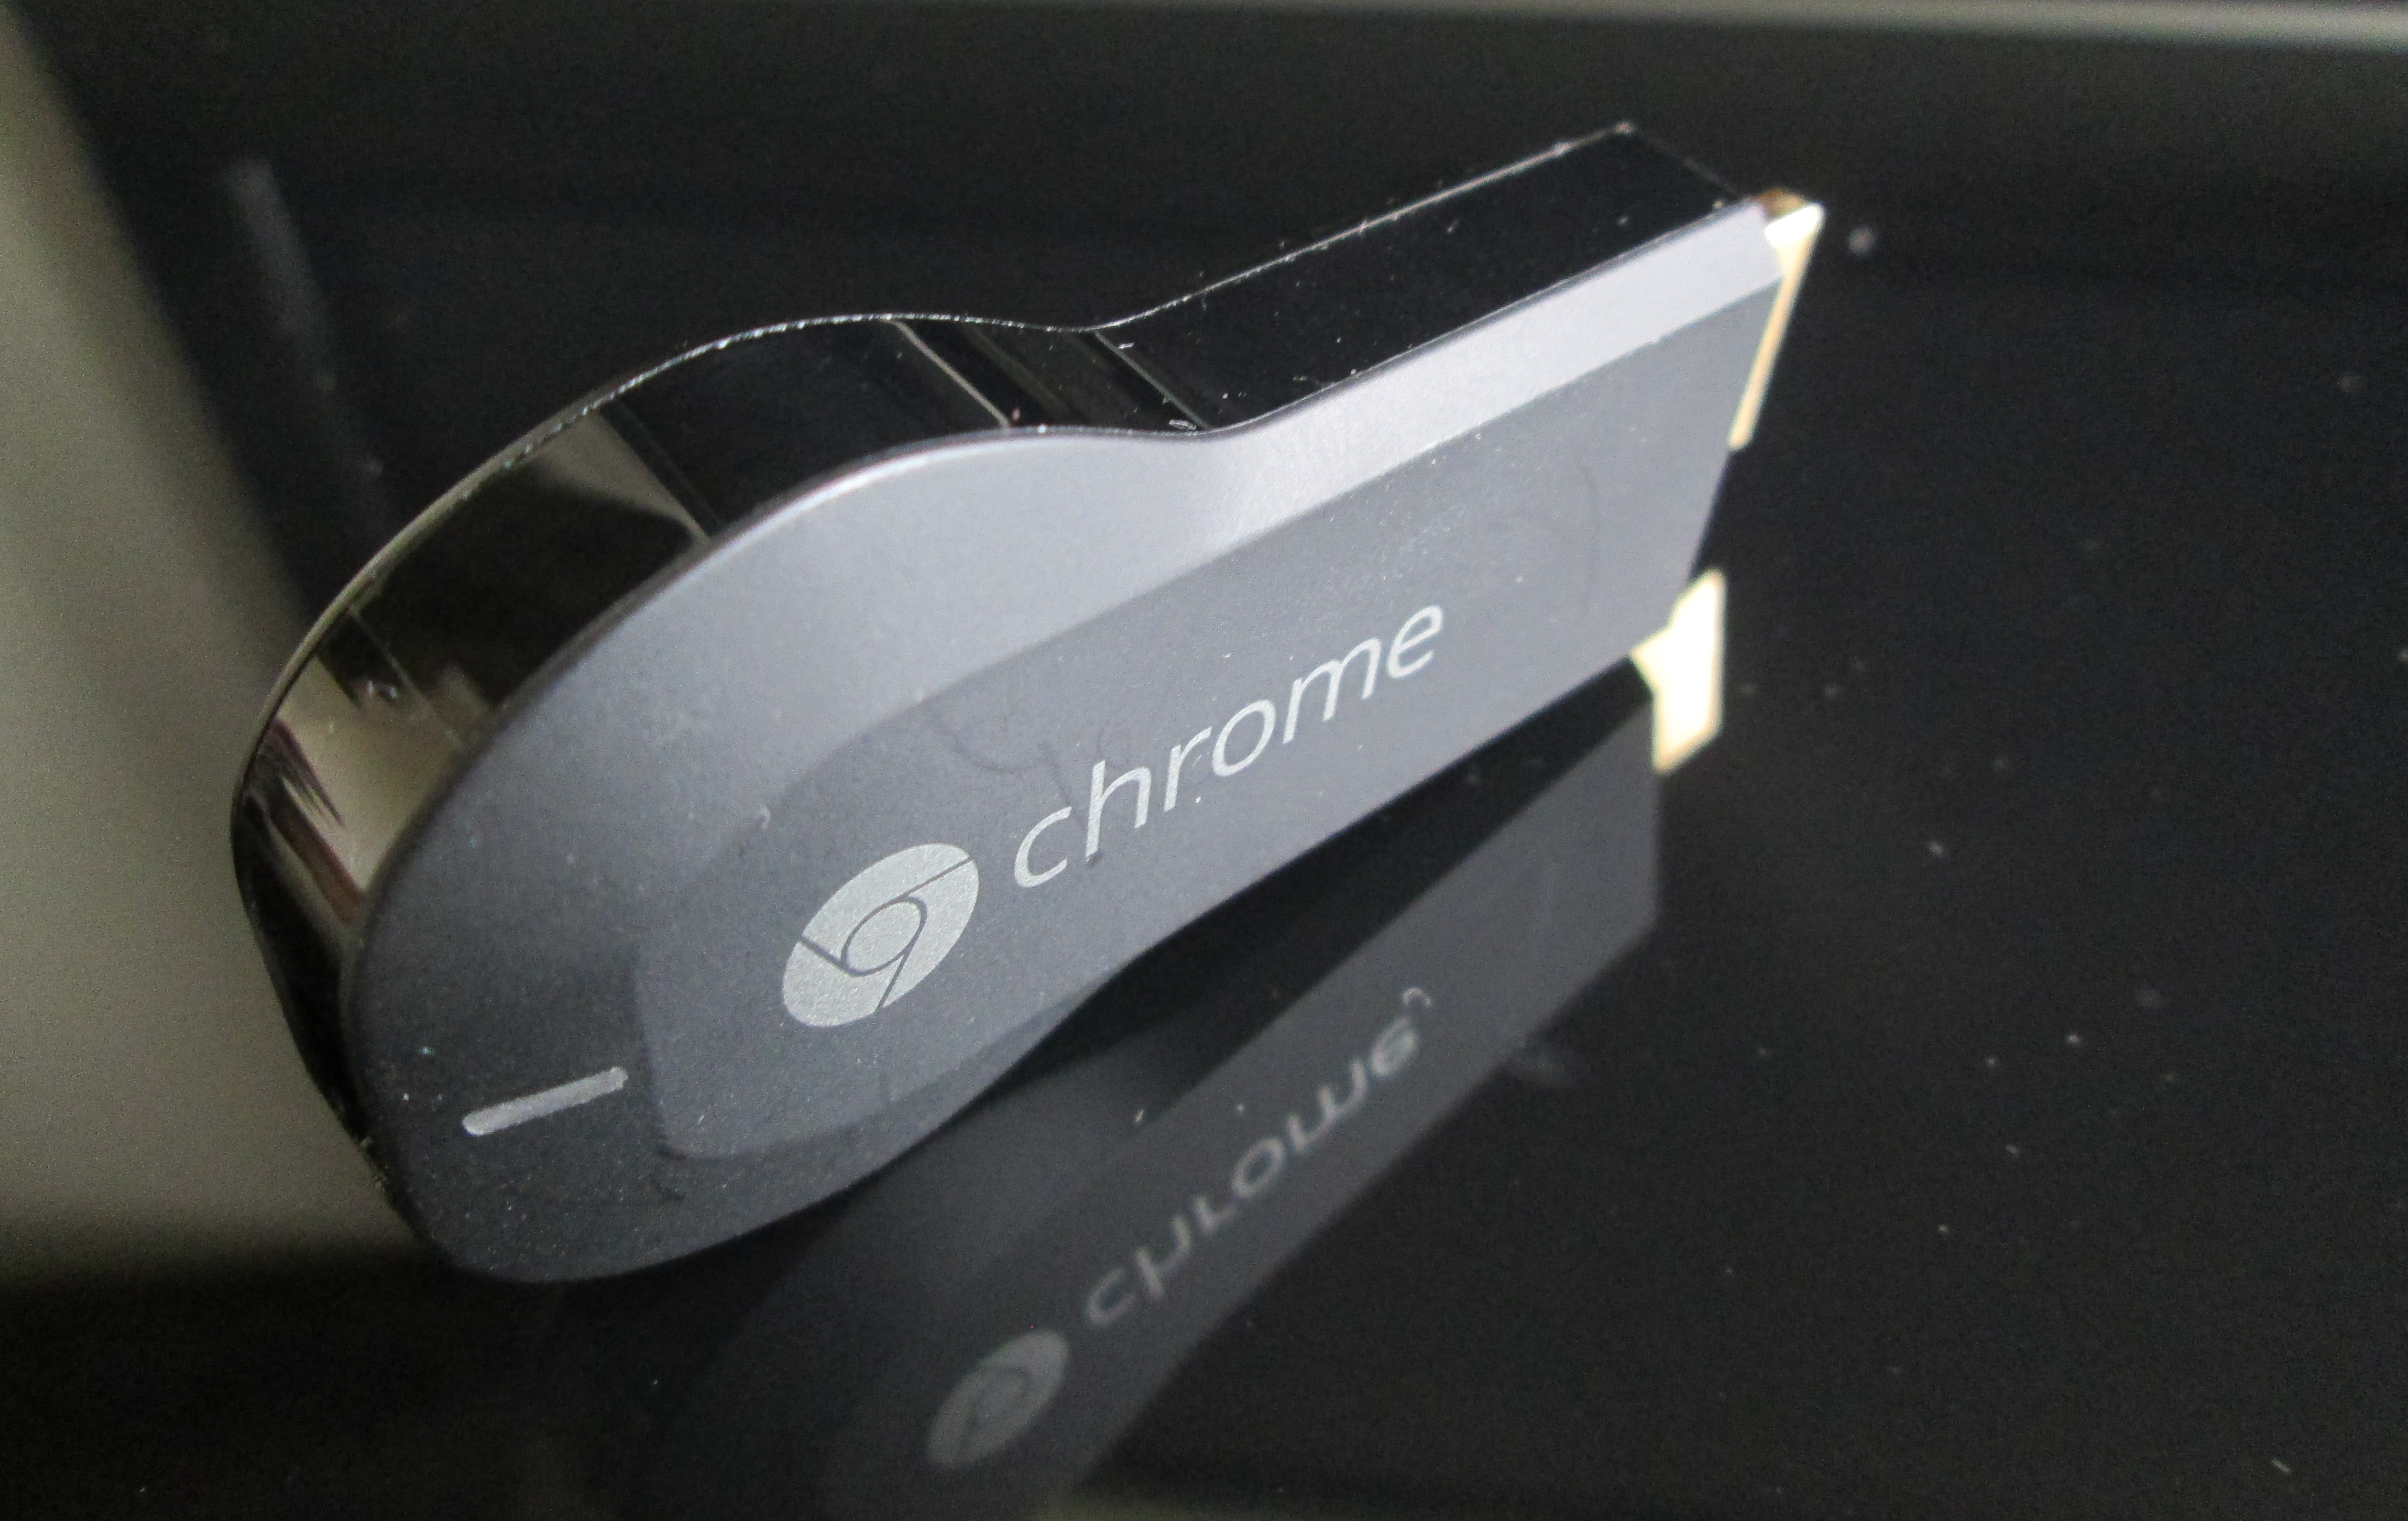
Not getting audio-only output from your Chromecast? Why not just plug it in the wrong way round… Read on!
For helping a senior family member switch from a faulty Linux laptop to a Chromebook, I was rewarded with a Chromecast (thanks Mum). Lucky me.
The plan, with my newly received gift, was to plug the Chromecast into a spare HDMI input on my Sony STR-DA1200ES A/V amplifier and enjoy listening to my Google Play Music collection, or watch some YouTube videos, as desired. My (naive) idea was that because I had HDMI into the amp, I could just enjoy the music without having my Panasonic TX-P42G10B Plasma TV switched on. Oh no. How wrong I was.
Simplicity, redefined
The first issue, which I quickly discovered, is that HDMI and other digital display protocols like Thunderbolt, Digital Video Interface (DVI) and DisplayPort (DP) operate in full cooperation with DRM – Digital Restrictions Management. By using a sub-protocol called HDCP – or High-bandwidth Digital Content Protection, the source device negotiates an encrypted link with the receiving device – typically your TV. The data then travels down (or up) the HDMI link “safely”, protected from digital content thieves, pirates, bittorrent users.. you know the sort: me and you. The customers.
But arguments aside about what rights one should have with the digital media they purchase, the reality is that the technology actually introduces more complexity and less convenience than promised.
The situation is made worse with how HDMI can be implemented. You can have end points – a source and a display device, for instance – and you can also have mid-point, passthrough devices. But when it comes to HDCP, pass-through devices have no say or influence over content encryption or negotiation – they just shunt the data onwards down the chain. HDMI splitters and strippers were introduced as another way of getting around implementation restrictions – including removing DRM, with varying results (HDCP, HDMI splitters/strippers and Chromecasts have been discussed on redditmore than once, not to mention XDA developers and other sites…). [ Incidentally, a highly regarded device, the HD Fury, won’t give you much change from £150-odd, but it is reputedly very good as totally stripping HDCP. ]
Dancing in the streams
DRM is an issue that will not go away, because we get back to the basic fact that controlling users through draconian methods of control only punishes innocent consumers, while not providing any tangible security benefit for the media plublishers.
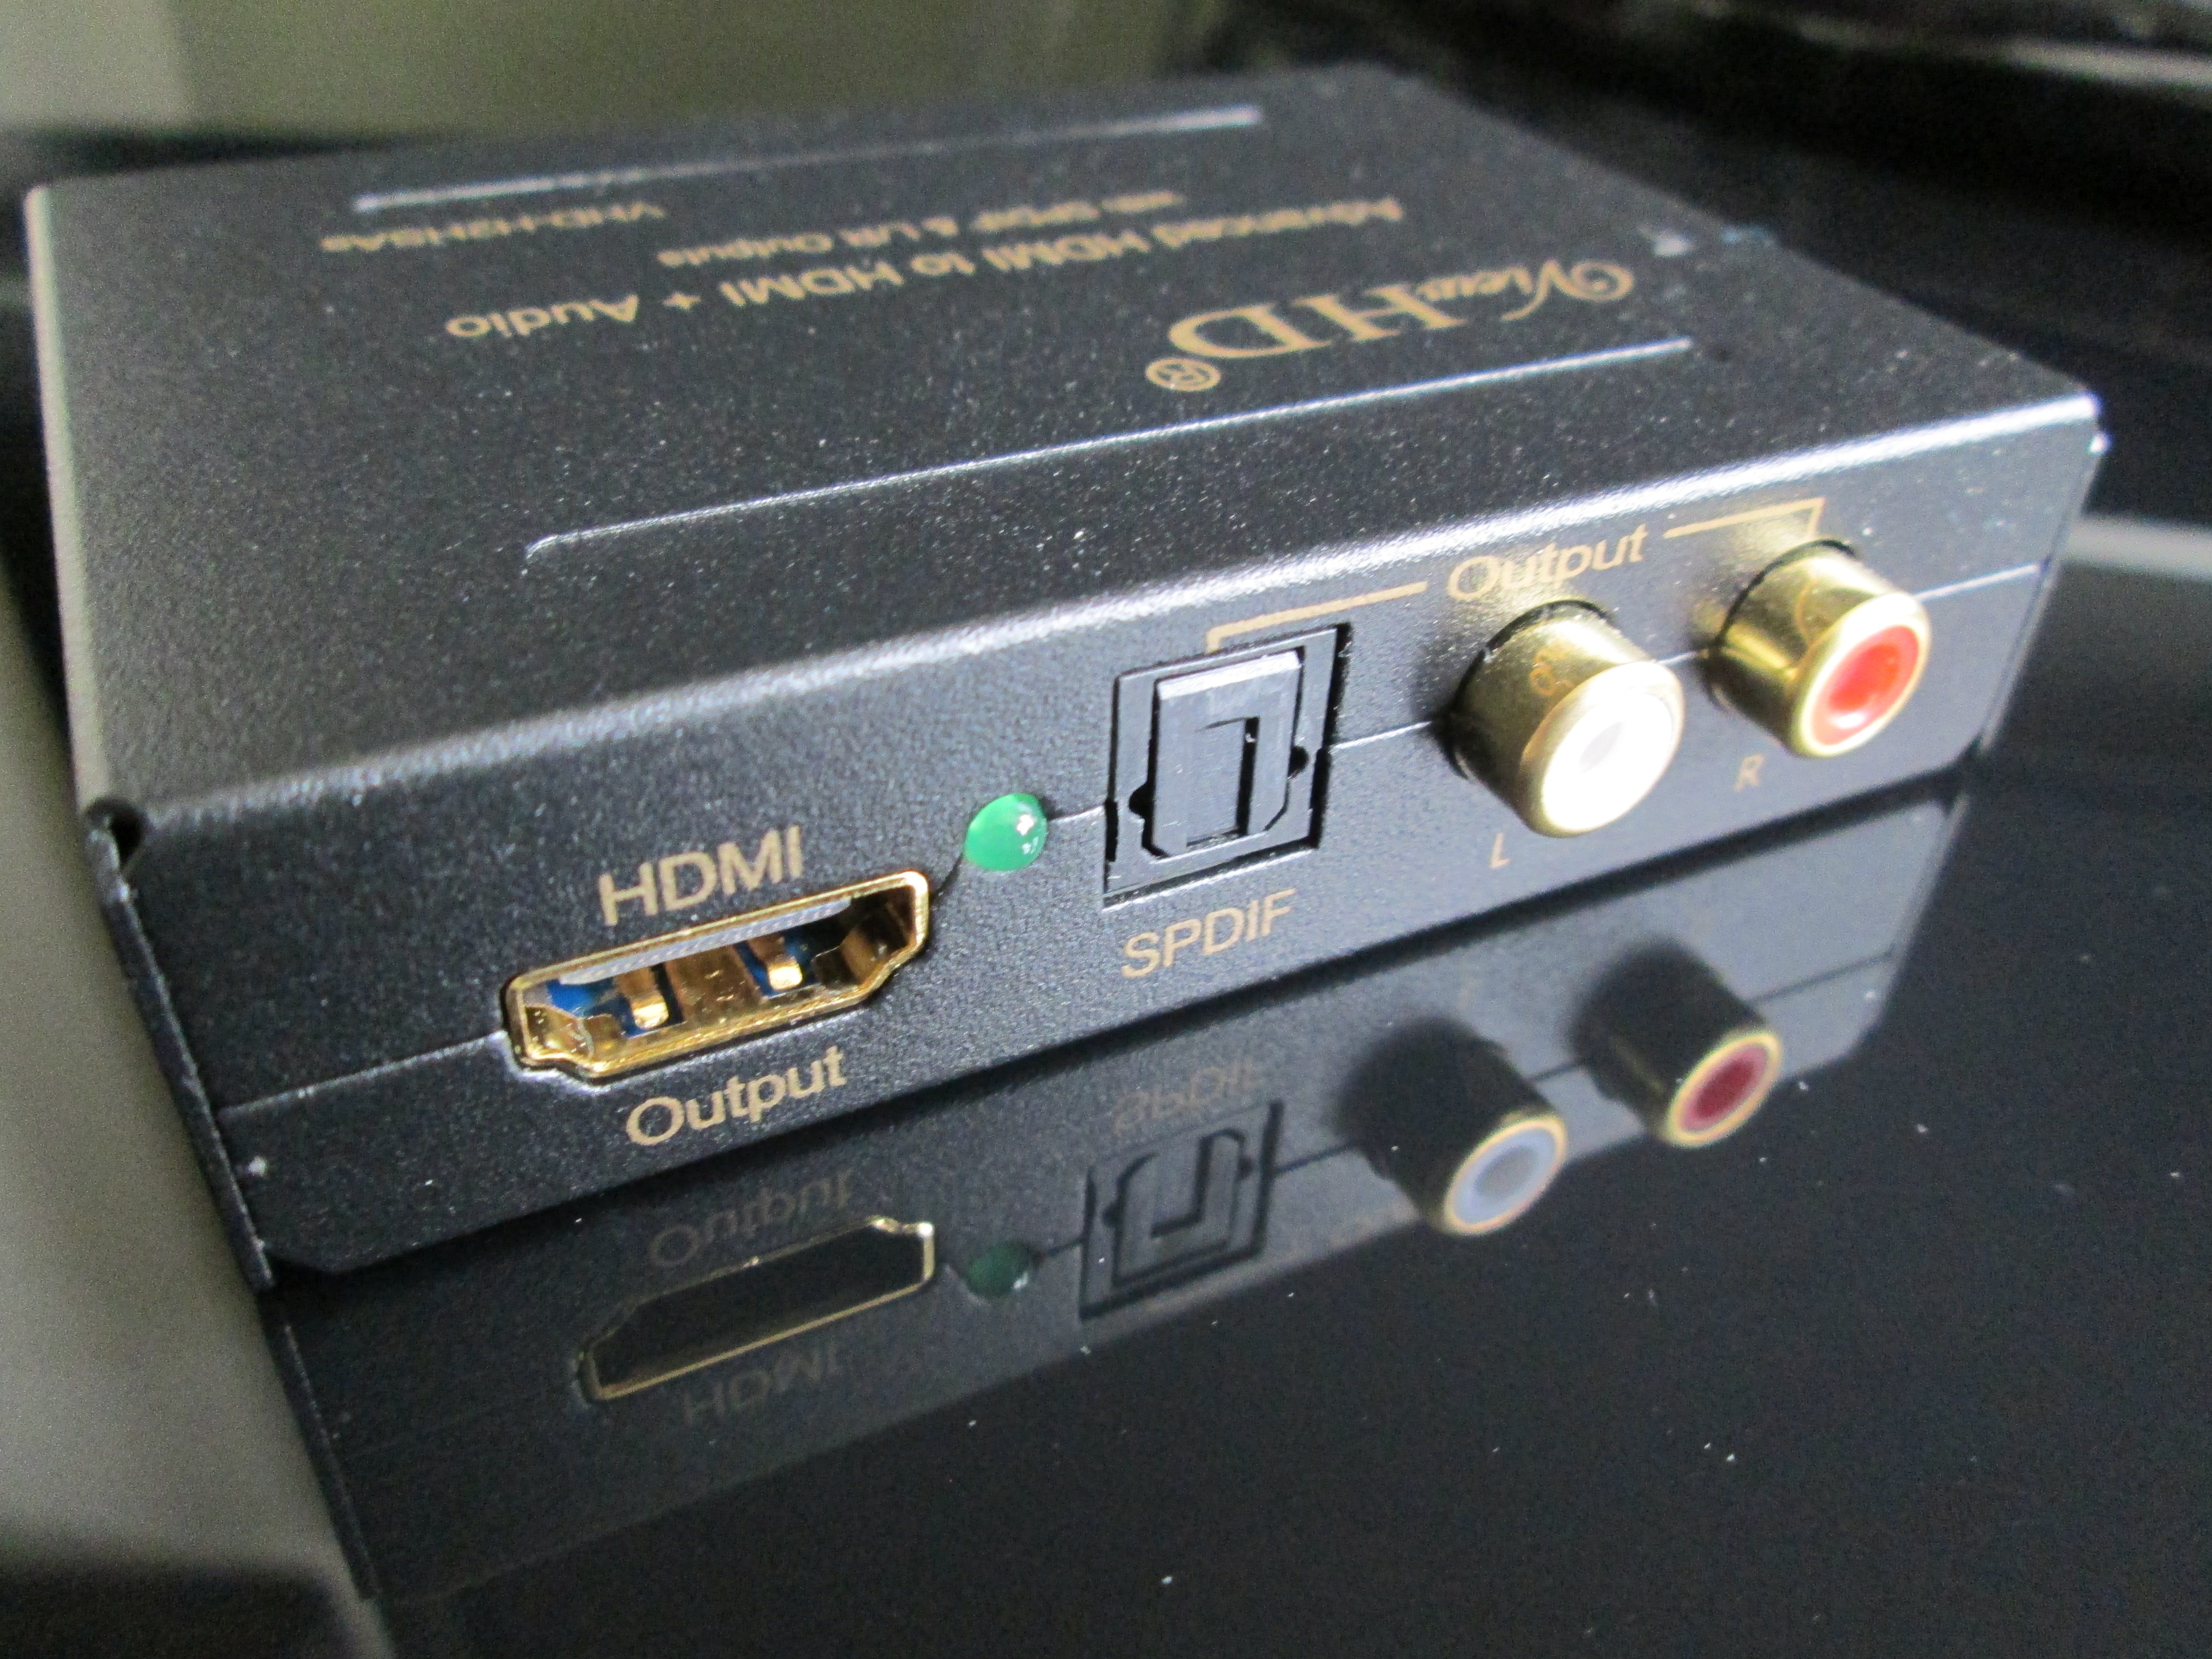
So we arrive back at my Chromecast. Through a number of unplugging and re-plugging efforts, I stumbled upon a strange solution. I acquired the ViewHD HDMI splitter, with the intention to split out audio from HDMI and feed an TOSLink optical cable into the A/V amp, but even using this required the TV to be switched on.
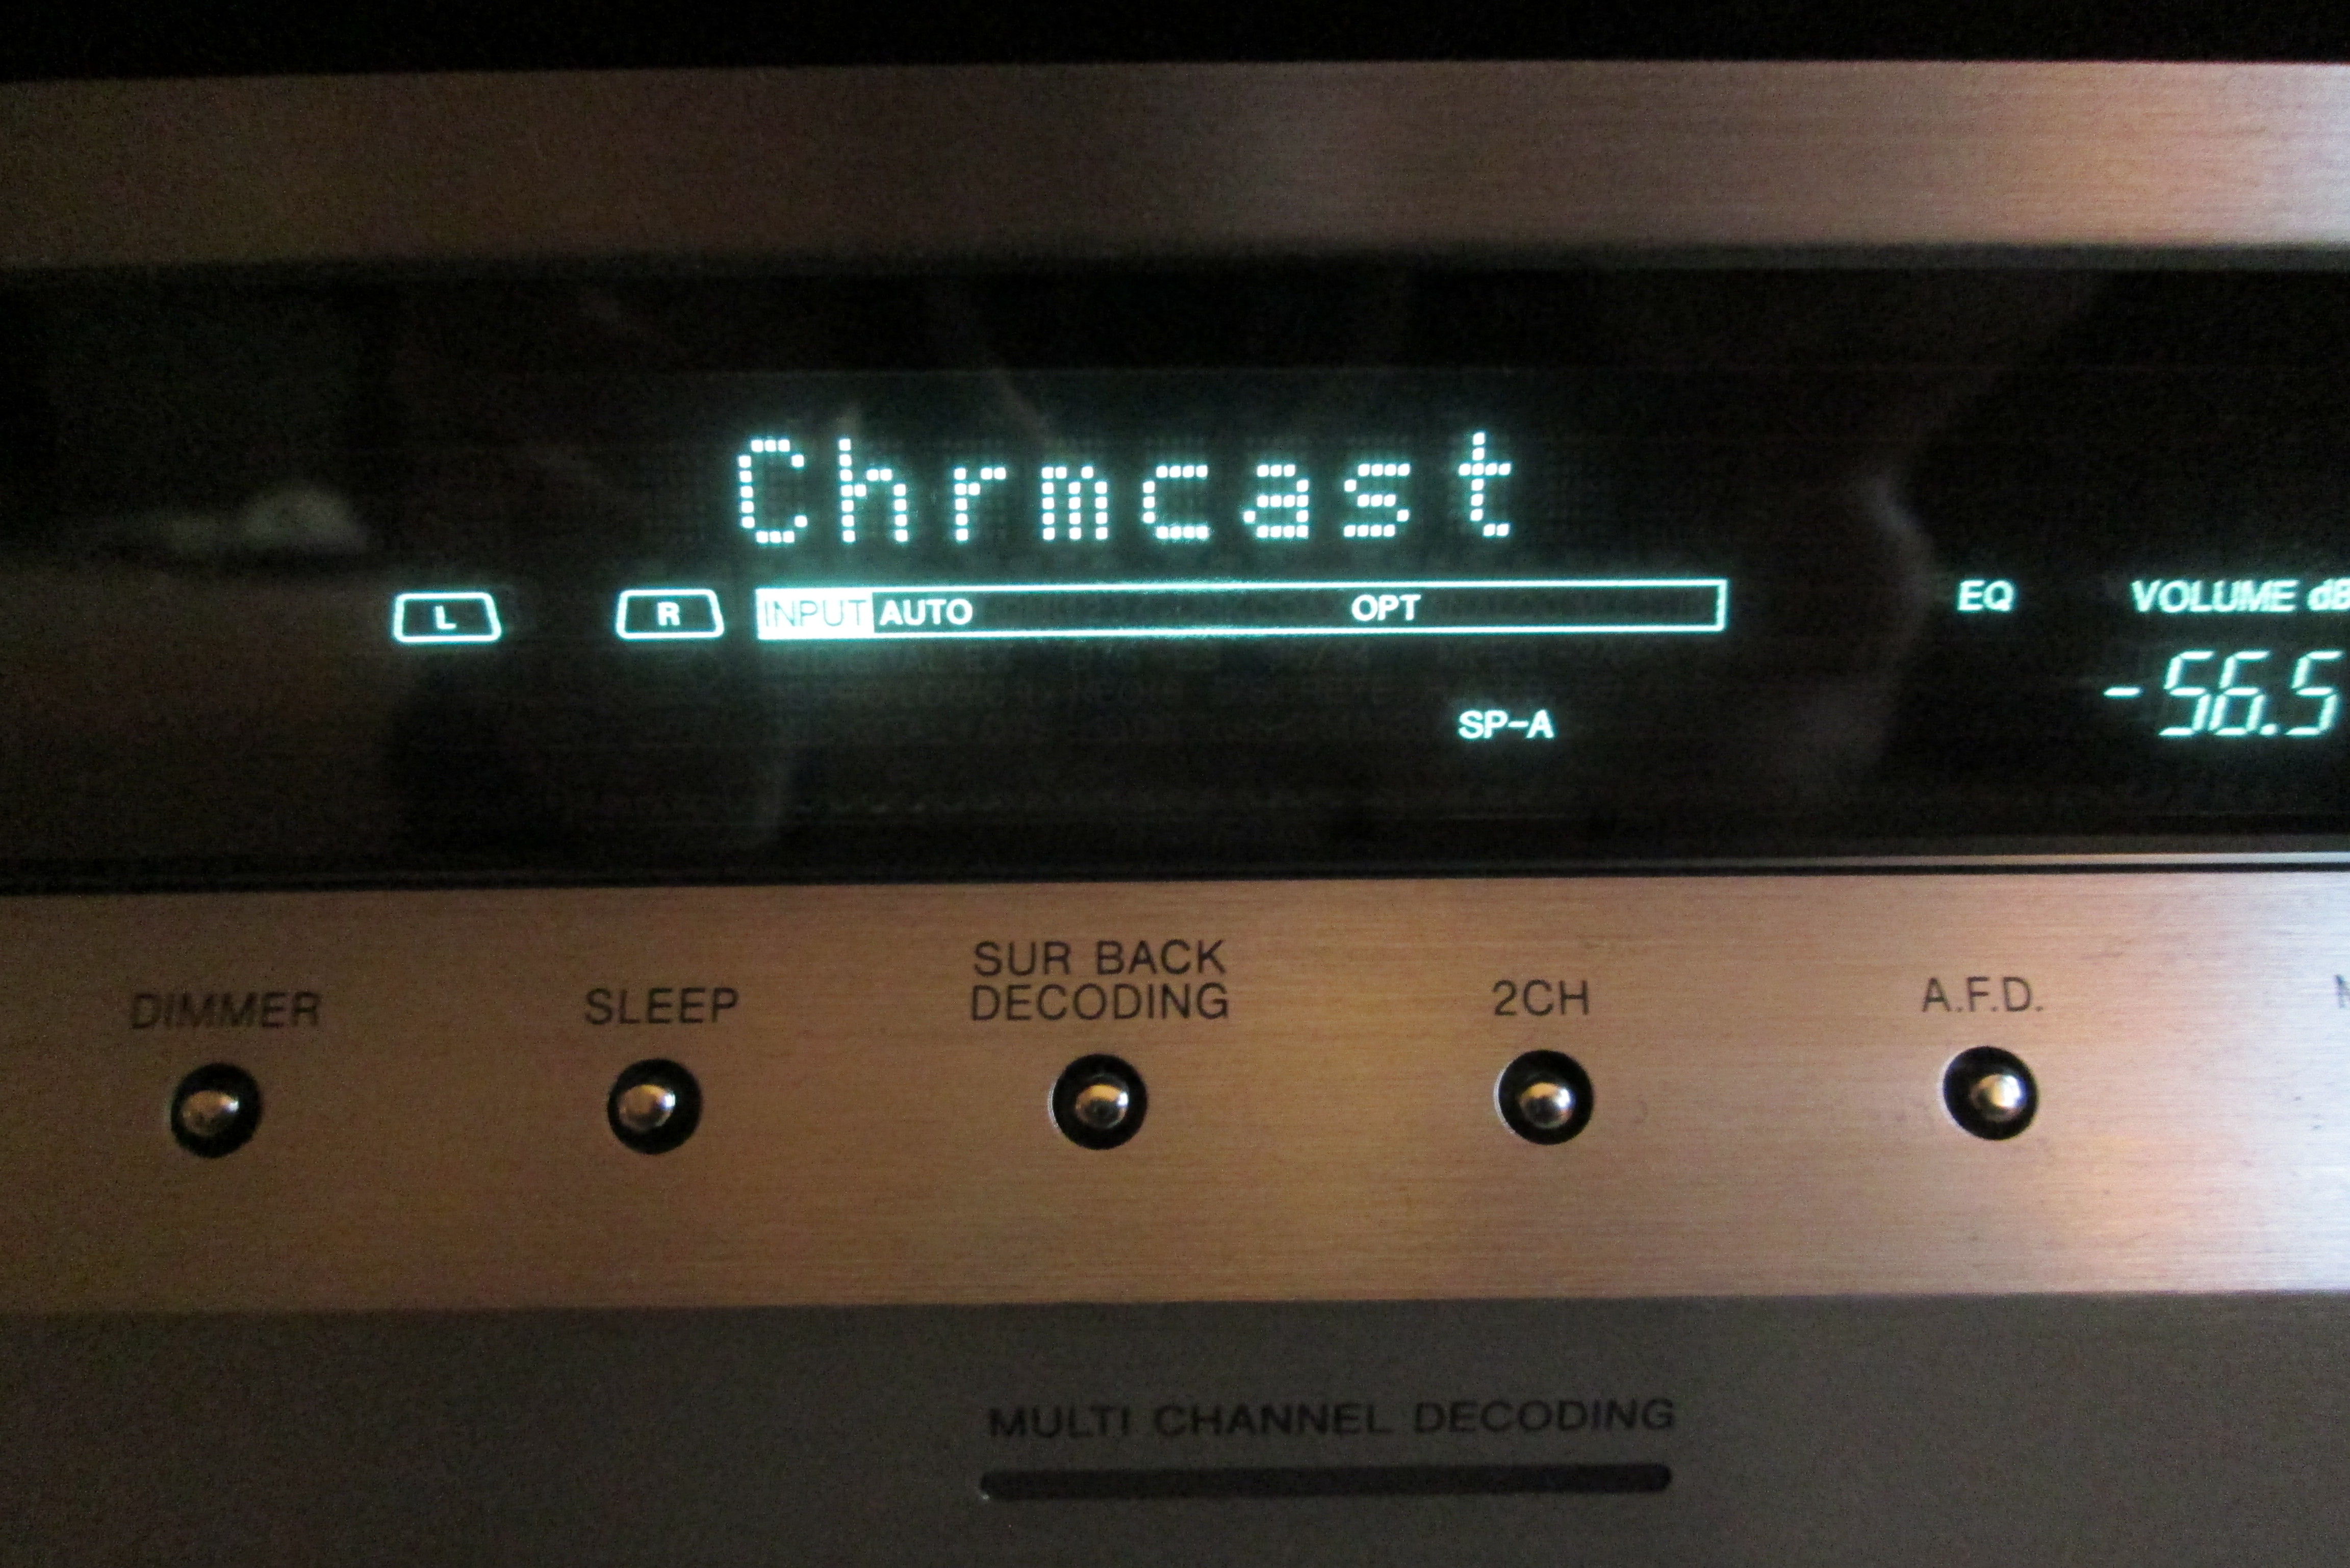
System singing sweetly: audio in full swing
But… what if the Chromecast thinks it is sorted with its display device? Strangely, this seems achievable by plugging the Chromecast into the HDMI splitter’s HDMI input, and then plugging the HDMI splitter’s output into the A/V amp’s output. Yep, let me repeat: connecting the HDMI splitter’s output to the amp’s output connector (which would normally go to a monitor) strangely seemed to fool the Chromecast into happily sending forth its content to the HDMI splitter, from which the optical feed supplies PCM audio at 48khz straight into the amp.
Selecting music, using Google Play Music on the Nexus 7 Android tablet, is now a joy that is almost completely reliable. Occasionally it reports that a track cannot be played, which requires disconnection of tablet from Chromecast and re-connection while playing the song. But send the Chromecast an album or playlist, and all’s good.
Conclusion
The downside of this strange result is that I can only use the Chromecast for one thing: streaming audio. Luckily, this is the only reason I go it, and the devices are so cheap (£30) as to effectively justify buying a second for the same TV, using another spare HDMI input.
Why the Chromecast and ViewHD behave quite like this, I cannot say. It suggests there could be other interesting workarounds with HDMI and various signal splitting devices .. but this is probably where I should end.
My philosophy behind this review is not just to compare the phone directly with other Android or iOS handsets, but also to focus on what it offers, independently of those other platforms.
In other words, for what this phone and OS provide, how well do they do it..?
Unboxing & initial impressions
I ordered through ZTE’s UK-based ebay site. The phone was dispatched via the 48hr Royal Mail delivery service, which is where £5 of my £38.99 spend was allocated. This was pleasing and does confer a certain progressive philosophy of ZTE. It also means the handset + accessories cost only £33.99 including UK VAT (sales tax), which I find astonishing.
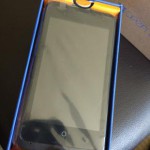
The packaging was robust and served its purpose. After removing the colourful box from its mail bag, and opening it up, there I was greeted with the phone in somewhat cheapish-looking celophane. Nevertheless, unwrapping indeed exposed the Open C as expected – not bright orange or blue, but dark and moody black – the way I like my phones!
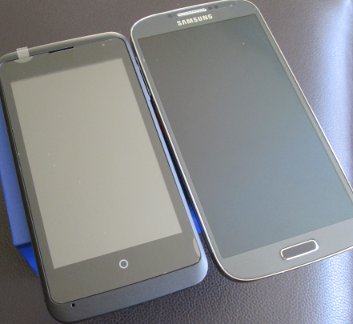
Although I was expecting the handset to feel cheap, I was actually pleasantly surprised. For its price, it feels very reasonable. The materials – including the screen – naturally are plastic, but given the feel of the plastic one expects from a stock Samsung Galaxy S4 (that is, not premium!), the Open C had a feel to it more like that of a pebble, with its soft-touch almost rubberised plastic rear cover.
Size comparison: Open C (left) vs Galaxy S4 (right)
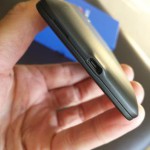
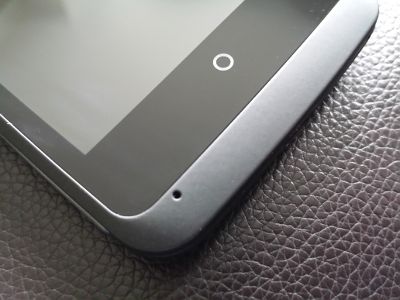
Attractive design features include the recessed ear speaker, which sits snuggly atop of the screen, and the subtle, angular curvature towards the base of the phone, which meets the centred microUSB socket smoothly and seamlessly. An iPhone 4 user I handed the device to commented on how nice in the hand it felt, and I must agree – it’s very comfortable to hold.
The compact charger and USB cable are standard fare, but the included earphones/headset are distinctly “cheap”. In this case, you get what you pay for, but this is a minor thing.
The recessed ear speaker at the top of the screen is attractively styled.
Powering on
Start-up and set-up
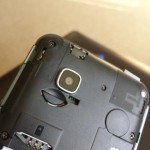
Taking the rear cover off the phone revealed the battery compartment, SIM slot and microSD slot. The battery was a very snug fit and the SIM slipped into the slot just fine. The microSD card slot wasn’t quite as reassuring, and I felt the need to double-check I’d inserted the card far enough. There are no spring-clip card slots on this phone; a clear cost-saver. But cover back on, this was no issue, and the cover feels integral to the phone once back in place.
The software set-up feature of the phone has been well covered elsewhere, so I won’t go into that here. One annoyance was that the phone couldn’t pick up my local time from any network I connected to, which I found unusual and slightly inconvenient. The UI to change date and time was slightly unintuitive but the task was soon accomplished.
Boot-up and running through this “wizard” was relatively quick and the phone was ready to use within a few minutes.
Getting contacts into the phone
The ThunderSync Add-On for Thunderbird can export your addressbook as VCard files. Although on first attempt these files were not recognised to import into the phonebook, trying again – once the phone’s set-up process had completed – yielded success. 241 VCard contacts imported perfectly.
The Import from SIM card function worked perfectly, as did the Import from Facebook feature. I didn’t try the Import from GMail feature, as I don’t store contacts there.
Considering these features are what the phone offers, I would say that it manages these tasks reasonably well, although the out-of-the-box experience was not quite as smooth as possible. It is a shame that CardDAV support wasn’t baked in too, but at least this is work in progress.
Managing contacts
A feature recognised by some Android users, and as a further plus, the Link Contacts feature allows you link an imported phonebook contact with a social media contact. In addition, the Find duplicate contacts feature allows you to easily scour the phonebook and delete or merge any identified duplicate contact records, as desired.
In fairly quick time, I was up and running with all my contacts in the address book.
Product box
Phone in wrap
Contoured base of phone
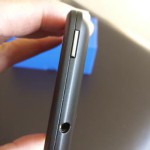
Top of phone
Back cover removed
Importing Media
Getting music, videos and photos on to the device is painless, thanks to its straightforward USB Mass Storage support. As an Android and Linux user, I was appalled when this transfer protocol was eschewed in favour of MTP on my Galaxy S4 – a “feature” of Jellybean+.
But back to the Open C. Controlling whether the phone’s memory or the storage card is exposed to the USB host (i.e. the connected computer) was achieved through the settings on the phone. Once connected, media transfers were effortless.
After disconnecting, simply opening up the Music player, Video player or Gallery displayed my media more or less as expected, although a 1080p mp4 video shot on the aforementioned S4 and transferred over, failed to materialise in the Video player’s file list.
Somewhat annoyingly, album art from transferred music also appears in the gallery, which seems a bit strange. To make matters worse, this same album art was not visible in the Music player for the albums to which it corresponded. Instead, I was greeted with placeholder patterns. I’m not sure how this problem is avoided, but it’s far from perfect.
In use: the User Interface & Experience
In software development, an oft-accepted maxim is that your version 1 release is basically a proof of concept. Version 2 is where you throw in lots of features, but version 3 is where it all starts knitting together well.
Given that this handset runs version 1.3, the FirefoxOS experience is acceptable. It won’t set the world on fire (no pun intended), but the key features are here – some better than others.
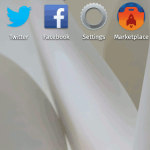
Homescreen
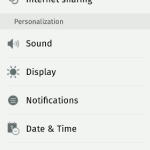
Settings
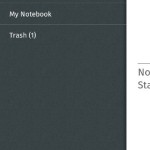
Notes app settings
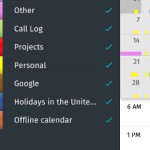
Calendar app, showing CalDAV and Google calendars
Album Art – appearing in Gallery!
Performance
Coming from a Galaxy S4, I was pleased with how responsive the Open C is. On the Samsung, Touchwiz (the user interface layer on top of Android) does a wonderful job of slowing things down and adding a “treacle factor”, generally incurring an extra second or so for each major application switch.
Surprisingly, the Open C felt more nimble and less weighed-down than the S4 once I had opened 8-10 different apps on each. Granted, the apps on the S4 are more feature-rich, running on a more feature-rich operating system – and I do have quite a number of them. But it’s more powerful hardware, you always pay by way of a performance penalty for complexity in software.
On the Open C, swiping across from one home screen to another was fluid and unencumbered, and opening apps was reassuringly nippy too. Nothing felt laggy and the biggest challenge was getting used to not having a back button.
General OS Features
There have been many comparisons with Android here and elsewhere, but I would argue that this is a testament to the capability of FirefoxOS. The Settings area provides a reasonable number of options, from power-saving, to connectivity, SIM management and security.
Unlike Android, I didn’t feel as though options we so nested to the nth degree that I couldn’t find what I needed, quickly. This was refreshing and gave me pause for thought over just how large and burdened Android is now by its own capability. This is, after all, a phone and Mozilla have fundamentally recognised this.
Sadly, one omission is Firefox Sync. I was surprised that, being a FirefoxOS device, it doesn’t support Sync with Mozilla’s servers out-of-the-box. What a shame – this will be inconvenient to some, and argues in favour of using Firefox (the browser) on Android, instead.
Another lamentable omission is a file browser. I couldn’t see any way to browse the local file system. Hopefully this will arrive in version 2 or beyond.
Where it does pick up the bat somewhat is with the Notes app, which seemingly offers Evernote syncing. Although I’m not an Evernote fan, I know that many people are, and this may sway some opinions. Along with CalDAV calendar sync, it goes some way towards being “cloud-friendly”, which is a nice touch for a browser-based OS… 😉
Hardware
The screen
The screen is where I have seen some criticism being levelled. Let’s clear this up: having become accustomed one of the highest-resolution (441dpi), most saturated colour displays (AMOLED) on the market, I am not offended at all by the Open C’s screen. In fact, quite the opposite. I was surprised how well text seemed to render on it and colour saturation seems average, which in my book is actually a good thing (not too saturated or too pale). At a claimed 233dpi, the resolution was workable, and the viewing angles from sides and from underneath were ok too. Viewing the screen from the phone’s top, downwards, was where it all went to hell though – everything neg’d out quite quickly.
The phone’s microphone positioning. Note the capacitive home-button. The general styling is also vaguely reminiscent of early HTC Android phones.
Sound quality
An often-overlooked area of smartphones is sound quality, via the headphone jack. Having transferred a random selection of OGG music files, I selected John Williams’ Jurassic Park theme. During listening I was very surprised that the Open C managed to dig up elements of a double bass (string instrument) in the performance. By comparison, the S4 couldn’t dredge up this particular detail.
Unfortunately, the rest of the musical quality was middling at best – brass sounded honky, strings somewhat electric and the combination of these plus percussion was a bit brash and ringing. When listening to the same track on the S4, I was greeted with a much purer, deeper soundstage with individual instruments identifiable and well placed. Timbre on the S4 was markedly improved over the Open C and generally the listening experience was superior. But still, it didn’t give me that low bass…
Whether the Firefox OS’s codec is sufficiently different to Android or whether this is hardware is, unfortunately, guess work. For general listening, say on the train for an hour, the Open C will be plenty good enough. It’s just not the last word in subtlety.
Battery life
The SIM I use for testing doesn’t have a data allowance, so I have switched off mobile data. This will have had a positive effect on battery life, but a negative effect on a fair test.
Still, despite not using the phone as heavily as normal in that regard, during testing and initial set up the screen has been on a fair bit, with WiFi connected at all times. I have seen nearly two days’ usage before needing its first re-charge, so that is encouraging. I was surprised, too, that after a night on flight-mode, the battery charge level had not shifted a dime, from 66%.
One minor issue though, is that at 10% battery remaining, the phone suddenly died and got stuck in a reboot cycle. This suggests the battery life/remaining isn’t possibly quite as accurate as it could be, although it could be argued that on its first charge, FirefoxOS hadn’t accumulated enough battery metrics to accurately predict exhaustion.
Camera
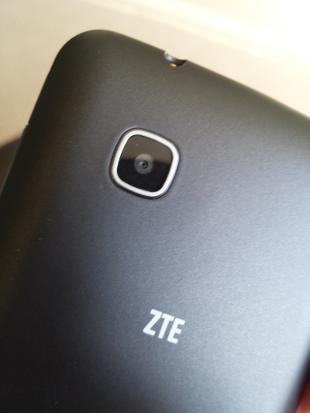
The Open C’s camera
This is a tricky area to judge. This is a £34 phone. It’s difficult to buy a decent point-and-shoot camera for that price, so how does one judge this fairly?
The 3.2MP sensor is mounted on the back of the phone near the top, in the customary location. There is no flash or manual/autofocus, and video recording is a rather old-school 352×288@15fps (according to GSMArena). My testing seemed to concur with that. Photos are stored as JPEGs, unless edited (in which case, for some reason they are then stored as PNGs), and videos as 3GP files.
In low-light settings, you can only expect average quality at best. Still, to the naked eye, colour accuracy could have been a lot worse.
Original of me
The image editor
Recolouring tools
Adjusted version.
The included software does allow some recolouring to help adjust pictures, and the Aviary app is easy to download and install, for more comprehensive off-line photo editing.
Hardware Buttons
Finally, the buttons themselves. In general use they don’t feel flimsy and give sufficient feedback. But I do question the positioning of the volume rocker and wonder if it is on the wrong side? I tend to be ambidextrous when using my phone – it goes to either ear indiscriminately. I suppose the volume rocker has to be on one side – the right hand side it is!
Summary
Considering this is a £34 phone…
Build and general quality is better than expected
Setting up is straightforward – although a couple of caveats:
Importing VCard contacts from microSD card failed on first attempt, but then worked
Plugging microUSB cable into phone didn’t have that reassuring “click”, but connection seems secure enough. (NOTE: this may have been the cable I was using; another cable did seem more secure)
Size and thickness is very reasonable – and better than I was led to believe on some blogs/vlogs. Phone is not too bulky and has a reassuring thickness when in the hand.
As a media device it’s fairly average, but as a phone which you won’t care about scratching up and little and using to the full, it’s great. At the price, you can forget about protective cases – just chuck it in a bag or your pocket and get on with life!
Final words
Comparing to flagship smartphones is unwarranted. It is not a flagship but an entry-level phone – so comparisons should be with Android phones at same price!
I was pleasantly surprised by the Open C. The phone hardware, at this price, is exceptionally good value. No, unless you’re incredibly limber it will not allow you to post selfies to Facebook (with no front-facing camera present), but is this a major thing?
Likewise, it’s a fairly “lightweight” experience all round: apps are less functional than their Android or iOS brethren, and the OS is less “tweakable”. But as a result, it’s swift and responsive in use, and the vast majority of software included is stable and acceptable.
As an entry-level smartphone, for £34 + £5 p&p, I find it hard to fault. If it weren’t for the stellar camera on my S4, I might consider switching to it.
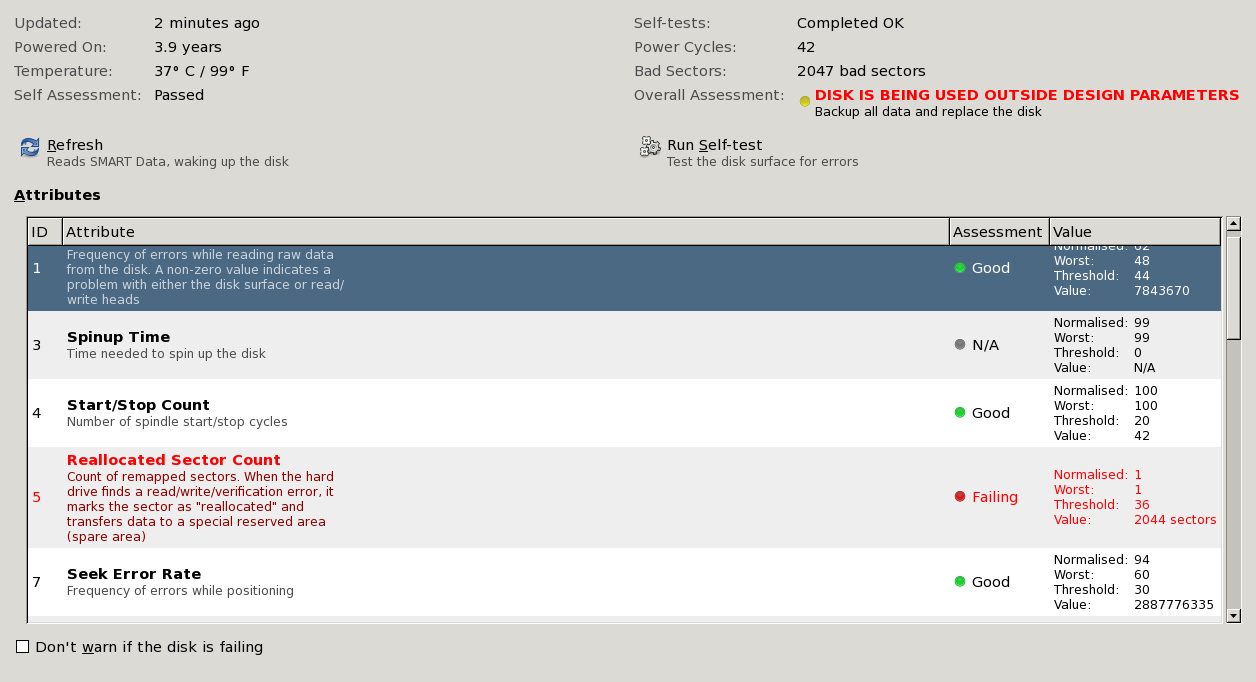
It all starts with that strange sound… In my machine’s case, a whining noise. As a sysadmin and/or experienced geek, you know something’s wrong. I suspect the head assembly has become detached and is scraping along the disk surface at 7200rpm…
SMART stats for the offending drive, which wasn’t being used outside design parameters, despite GNOME-disk-utility’s opinion!
Naturally, the usual recovery tools don’t work… and the drive sounds shot.
# pvmove /dev/sdd1 /dev/sdg1
/dev/sdd1: Moved: 0.0%
/dev/sdd1: Moved: 0.0%
/dev/sdd1: read failed after 0 of 2048 at 0: Input/output error
No physical volume label read from /dev/sdd1
Physical volume /dev/sdd1 not found
ABORTING: Can’t reread PV /dev/sdd1
ABORTING: Can’t reread VG for /dev/sdd1
# dd if=/dev/sdd1 of=dev/sdg1 bs=4096
dd: reading `/dev/sdd1′: Input/output error
2+0 records in
2+0 records out
8192 bytes (8.2 kB) copied, 0.0992418 s, 82.5 kB/s
# dd if=/dev/sdd of=dev/sdg bs=4096
dd: reading `/dev/sdd’: Input/output error
1+0 records in
1+0 records out
4096 bytes (4.1 kB) copied, 0.0205753 s, 199 kB/s
This is the third 1TB Seagate ES.2 drive I’ve had develop bad sectors. Although they have a 5 year warranty, they seem to start expiring after 3.
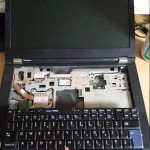
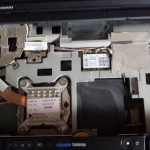
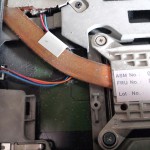
I have a Thinkpad T420 – now 2 years, 6 months old. Started to notice the fan seemed a bit noisier than normal and the CPU was reporting a temperature of around 60deg C, even when the machine wasn’t doing very much.
As suspected, 30 months of usage without a clean is a little bit too long. Cleaning a laptop fan can be fairly straightforward – this took just two screw removals. Of course, always seek advice and YouTube videos if you need help to do yours! 😉
After the procedure, my laptop runs about 10-15deg C cooler and is much quieter.
If you have a curious bent – and you bought a Chromebook thinking it would be the answer to all problems, then chances are you probably gave up on that notion fairly quickly and installed a variant of GNU/Linux on it.
If so, well done. Thankfully, Daniel Berrange – a Red Hat fellow and Fedora users, posted some instructions on how to get Fedora 18 (Spherical Cow) installed on a Samsung series 3 (XE303C12) Chromebook. This is the route I decided to take, having been a Fedora user for many years. But I digress.
If you have GNU/Linux installed on a Series 3 Chromebook, you may want to remap those Google-inspired function keys that run across the top. You know, those keys with the arrows, reload, window-size/position, brightness and volume icons… Yeah. Actually, they’re function keys: F1 to F10.
A good read for how to identify what each key is can be found here, on this askubuntu post which details the xev command. xev displays the numeric keycode of the keyboard key (!) you just pressed.
Keys F1-F10 use the following keycodes:
Key     Keycode    Equivalent
Back        67          F1
Forward     68          F2
Reload      69          F3
Resize      70          F4
Stacking    71          F5
Bright down 72          F6
Bright up   73          F7
Mute        74          F8
Sound down  75          F9
Sound up    76          F10
To remap these keys, we now need to identify what extended functionality the XF86 multimedia keyset provides.
Given fair test conditions, everyone knows wired network connections are faster than wireless, right? How about when your wired connection crawls along at 1/5 of the speed of your wireless connection? What’s happening?Below are two CAT 5e Ethernet cables, of the type you’d typically use to connect a router to a modem, or perhaps your PC directly into your router instead of using WiFi. You might connect up other network-capable devices in your home too, such as a PVR/HDR, Blu-ray player and even your TV. In doing so, you may pick up an old Cat 5 cable “you had spare” to do the job.
Beware, that not all Cat5e is the same!
If you look closely below, you’ll see that the lower, grey cable is type 568A, whereas the upper, black cable is568B. Ethernet cables come as UTP or STP (Unshielded or Shielded Twisted Pair), meaning that each pair of conductors (wires) inside the outer sheathing are twisted together. This helps cancel noise and improve transmission.
The difference between A and B is in the way these twisted pairs are paired up. If your router has N-Way negotiation on its network connections, it should be able to work around using the two different types of cable. But on my router, with N-Way negotiation, this didn’t appear to be the case.
Testing this using speedtest.net with cable type A, I got a paltry 5Mb/s down and 4Mb/s up. Over wireless, I got 20Mb/s down and 17Mb/up. It turned out that my router can’t handle type A cables very well. Using a type B, I got 44Mb/s down and 18Mb/s up. More like it!
So the next time your network is running slowly, check your cabling. Even if it’s a well-known brand (my type Acable is a Belkin Cat5e), it may be causing a drop in performance which is easily, and cheaply, corrected. H/t +Bob Beattie #networking#speedtest#cat5e
I was so happy recently to unpack my brand new Motorola RAZR HD. It’s a lovely device. Wonderfully built, with a 4.7 inch 720p screen, replete with Gorilla Glass, and backed by a rubberized kevlar weave. The aluminium strip separating the two, running around the edge of the phone, provides a premium feel.
Or, at least, this is what I was led to believe from various reviews.
In reality, what you have is a beautiful brick – with good battery life. Android 4.1.2, the operating system shipped with the phone and modified by Google/Motorola Mobility, to ensure the phone is quite unusable, provides an amazing experience – if you connect up your Google account.
The Empire Strikes Back
What happens if you don’t have a Google account, or if you’re unprepared to create one?
What happens is that the software on the phone may refuse to play nicely with other software you choose to install. Here are some examples of this obnoxiusness:
Phone set-up
Before even seeing the home-screen, you are prompted to log into your Google account – or create a new one. You decline.
You are reassured that it’s a really good idea to create a Google account, otherwise you’ll “miss out”.
Resolutely, you continue. You get to the home screen. Then you want to install something from the Android Market (sorry, “Google Play”). You now cannot avoid creating or using a Google account.
Contacts
The phone is still behaving as though you are not fully connected to Google. Therefore, your data storage is predominatly on the phone only.
However, you might want to check this in ‘Accounts and Sync’ (which we’ll get on to in a sec)
You have the option of synchronising your data off elsewhere, away from Google’s servers. The CardDAV Sync software on Google Play provides the vehicle for doing this*. You download and install it, set up the sync with your CardDAV server, and sync away.
You might find that some of the software from Google updates on your phone during this time, now that it has access to the market.
All good… but, you soon come to realise that you cannot add new contacts to your chosen sync location. Take the scenario where you receive an SMS from an unknown number. You try to add the contact from the SMS, and can only do so to local storage.
Worse still, your only option to alleviate this – the only sync location you can add contacts to is – that’s right, a/your Google account.
If you delete your Google account on the phone, you then find that you cannot sync your contacts anywhere, because you cannot specify a default Contacts Store in the Contacts app.
Calendar
The same is broadly true of the Calendar. If you are not sync’ed with a Google account, the only calendar you can use on the phone is the built-in phone calendar. You cannot use another, third-party calendar as the default store or synchronisation copy.
If you create calendar events on your phone without a Google account, even though you have other accounts which provide full calendar syncing capability, you will still be creating an event on the local calendar that has no synchronisation counterpart
During the course of writing this article, strangely the option appeared in my calendar to utilise alternative calendars when creating an event. We shall see if this persists..
Accounts & Sync
This section has become a total mess in Jelly Bean – especially in Motorola’s implementation.
You start at the home screen: swipe down (or across from left-to-right) to get to Settings (the cog symbol)
In Settings, you scroll down the list to the Accounts section. Hit CalDAV or CardDAV.
You are then taken to the respective app’s account information with a link to Edit account settings. Let’s hit that.
The screen scrolls again to another black screen showing the same account, the settings of which you want to change. Yet another tap on this…
.. and hey presto, you’re finally in! Here you make changes and then hit the back key.
… and then hit the back key…
… and then hit the back key…
and then you’re at Settings again, so..
… you then hit the back key…
…and you’re out! (seriously, was this actually DESIGNED?!)
Going the other way into the apps settings (sorry if this is too painful for you) you first hit the Apps shortcut:
Hit the CalDAV or CardDAV icon
You then have the option: “Add account”, or “Go to accounts & sync”. Let’s say I want to edit an account, I’d choose “go to accounts and sync”..right? I tap it.
Oh, then there’s a pop-up style interface with ALL of your sync accounts. So I have to find my CalDAV app in the sync accounts list and tap on it…
Then I can see the calendar account I want to sync. But how do I edit it? When i tap on it, it synchronises! Ahh, wait, there’s a menu/settings button (the one with three squares). I tap on that…
… and get the options “Sync now” or “Remove account”.
So, let’s get this right: to EDIT my app’s data, I go to Settings > Accounts & Sync (not to the app). And when I want to SYNC the account or DELETE it, I go to the app! That’s logical!
In summary…
Android is an open source ecosystem that encourages vendors to produce lock-in experiences which are frustrating, dysfunctional and unintuitive.
And to think I was pro-android this time last week. I suppose I still have the t-shirt. The retailer will soon have the phone back, though.
bootnote
*CalDAV sync and CardDAV sync are both great pieces of software that fully get my support (and have done, in the financial sense). I use them here as examples of good apps which are potentially made almost impossible to use by the restrictions imposed by Android OEMs.
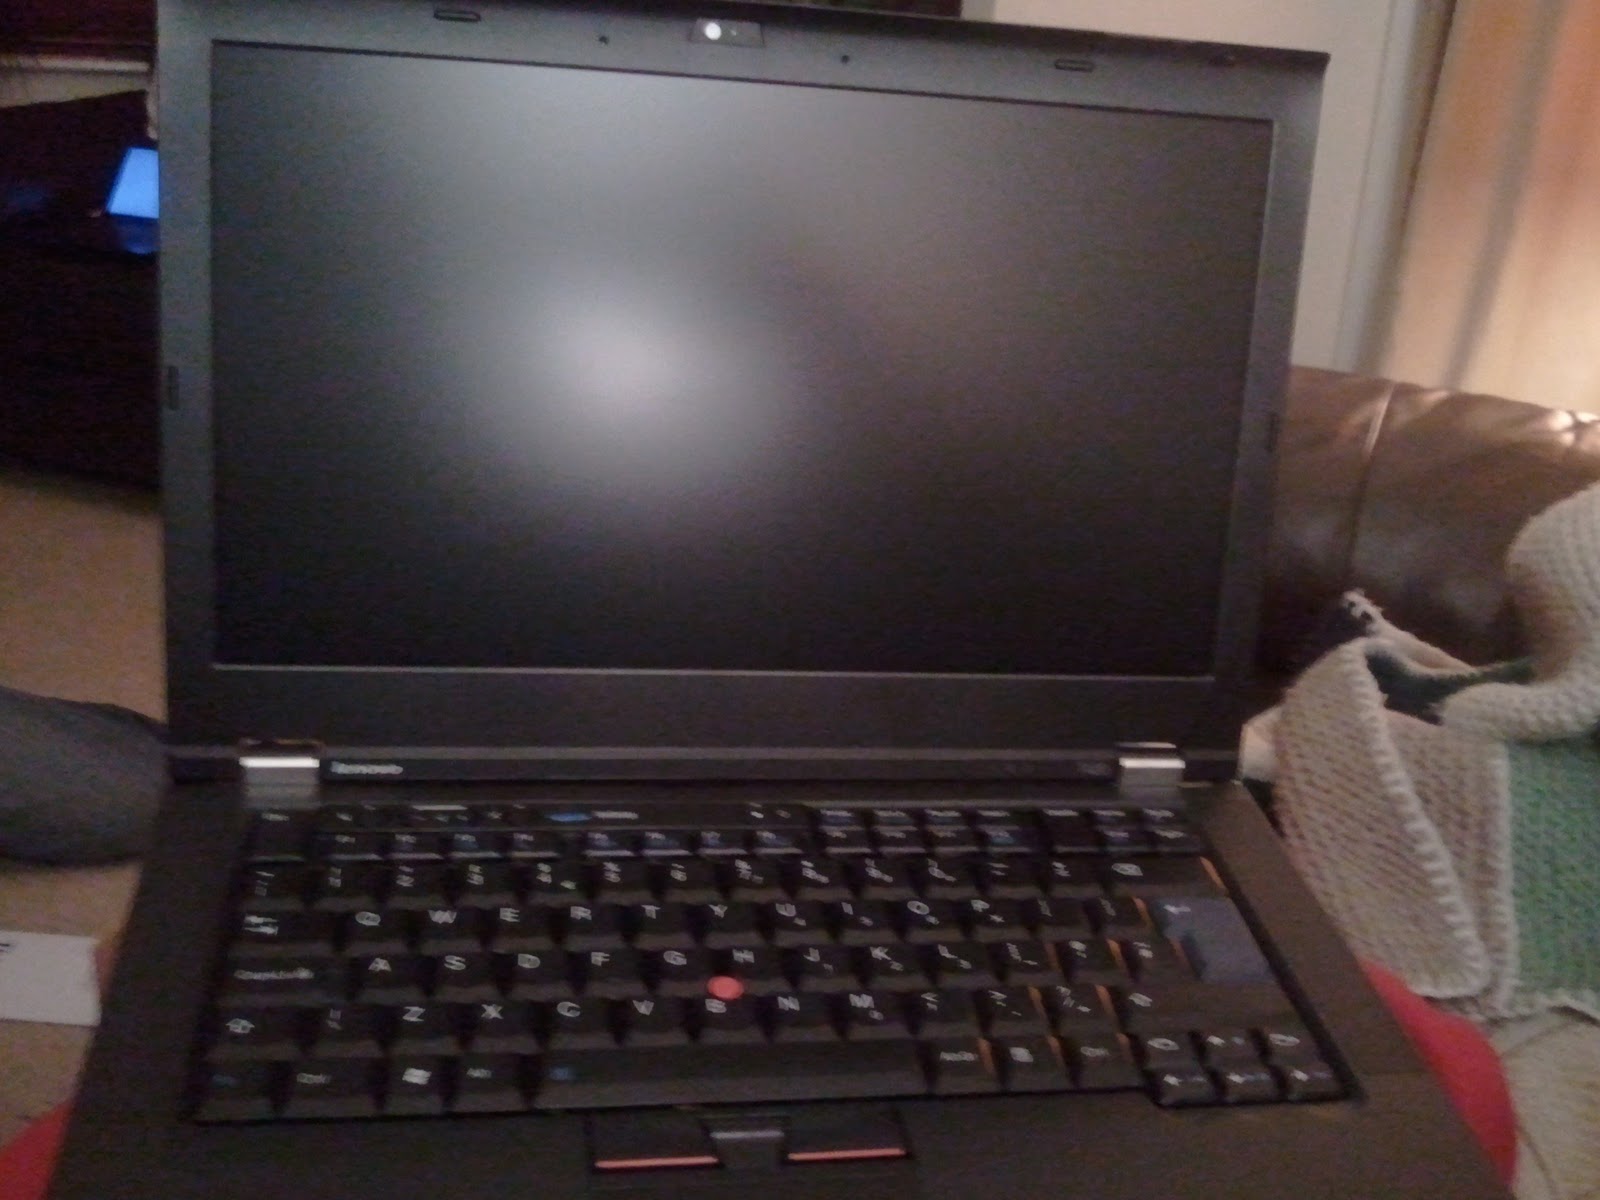
It is with incredible reserve that I discuss my new Lenovo ThinkPad T420, such is my excitement. As a natural born geek, software developer and sysadmin, there is something about a ThinkPad which is “just right”.
The lure of a ThinkPad is unquestionable. It’s the promise of your best bit of code ever. It’s the idea that it’ll be with you for years; your faithful companion. It’s the reassurance of industry-leading build quality and top-spec engineering, using high quality components. But it’s more than that too. It’s an identity, a bit like that of Apple users – but thankfully in more self-respecting way. You have a ThinkPad, you join an elite. It’s everything you want.
You want this so badly that it comes as a bit of a surprise when all is not quite what it seems.
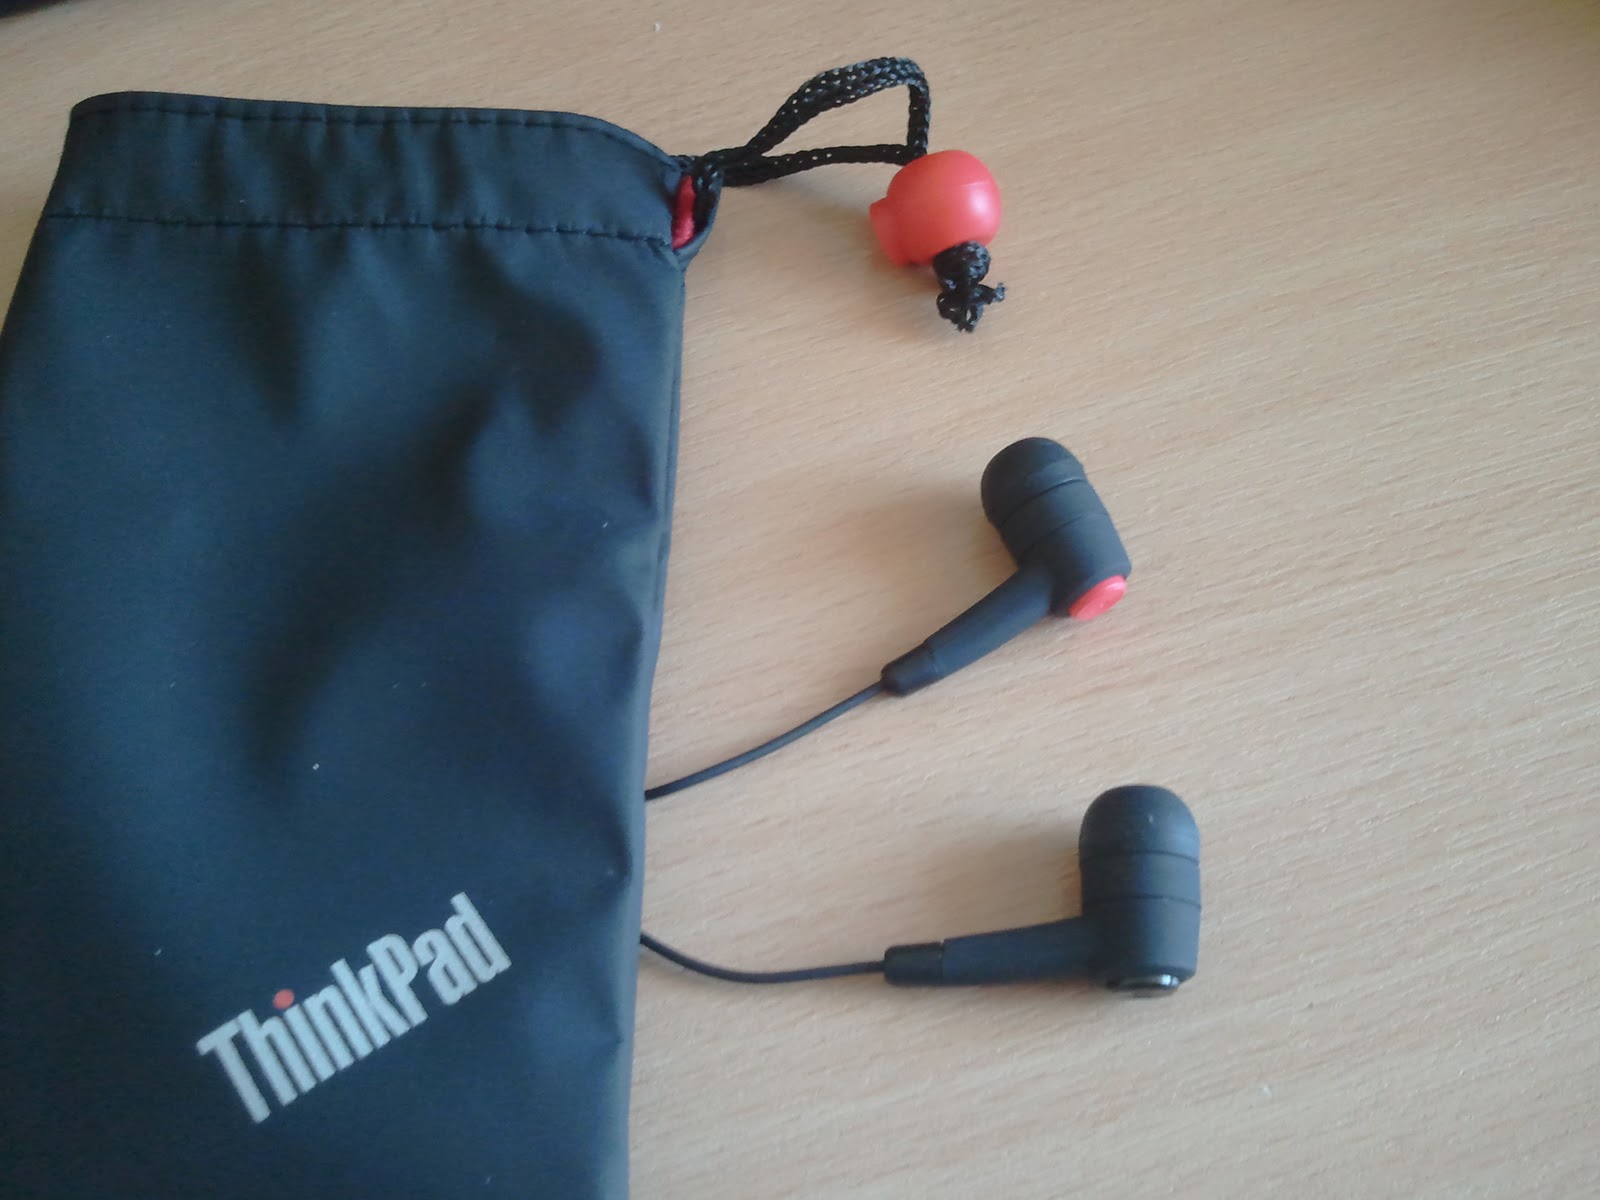
Branded accessories – one of those indulgences.
Better the devil?
As Lenovo only offer such spiffing hardware bundled with a throwaway operating system, you must suffer the wasted hours and ridiculous horseplay that ensues from such choices being made for you. We are all too familiar with this scenario… so, I’ll continue!
Here is my experience, abridged:
Unbox, connect battery, plug in power, switch on. It switches itself off. And then back on – phew!
Windows 7 starts up and completes its install process. You are prompted to answer a few questions along the way:
Do you wish to use Norton to protect your PC? I choose No.
It prompts again: “Are you really, really sure you don’t want to use Norton???”. I really, really confirm that yes, I don’t want to use Norton, thanks all the same.
Further into the installer, you are prompted to accept the Windows EULA (end user licence agreement). At the same point, you are also prompted to accept the Lenovo warranty terms. You cannot proceed if you choose only one. I imagine that this is another Microsoft “initiative”, a bit like Restricted Boot, which attempts to force people (through fear, usually) into sticking with Windows.
Finally, it finishes setting up Win7 and loads up the desktop. On the offchance that there is a warranty issue, I decide to make a backup using Windows Backup. Unbelievably, the Windows partition (C drive) contains 26.39GB of data. WHAT??!! This is a freshly installed operating system. How on earth can it consist of so much… bloat?! There is also a system partition (1.6GB, of which 900MB or so is used) and a Lenovo recovery partition (17GB, of which 9GB is used). So, I have 36GB of disk space used up for a fresh install of Win7, plus some Lenovo utilities and Google Chrome (installed by default – the only good software choice made by Lenovo so far). Hesitantly, I begin the backup process to Verbatim DVD+R discs.
3 hours later, now on the 4th disc, the back-up process fails. The error given is unspecific. I now have a collection of 4 shiny new drinks coasters.
I dig into the Lenovo software and find that I can install “Rescue and Recovery” software, presumably from the Lenovo recovery partition into Win7. I install it, which takes about 4-5 mins on this core i7 2640 machine.
Oh, wait a sec, what’s that? Some pop-up just appeared above the clock in the right hand corner. Something about Norton doing something, was that? Oh, it’s gone. So, despite being really, really clear that I did NOT want Norton installed on my machine, er, there it is. Installed on my machine. Poor Lenovo, poor. And it gets better.
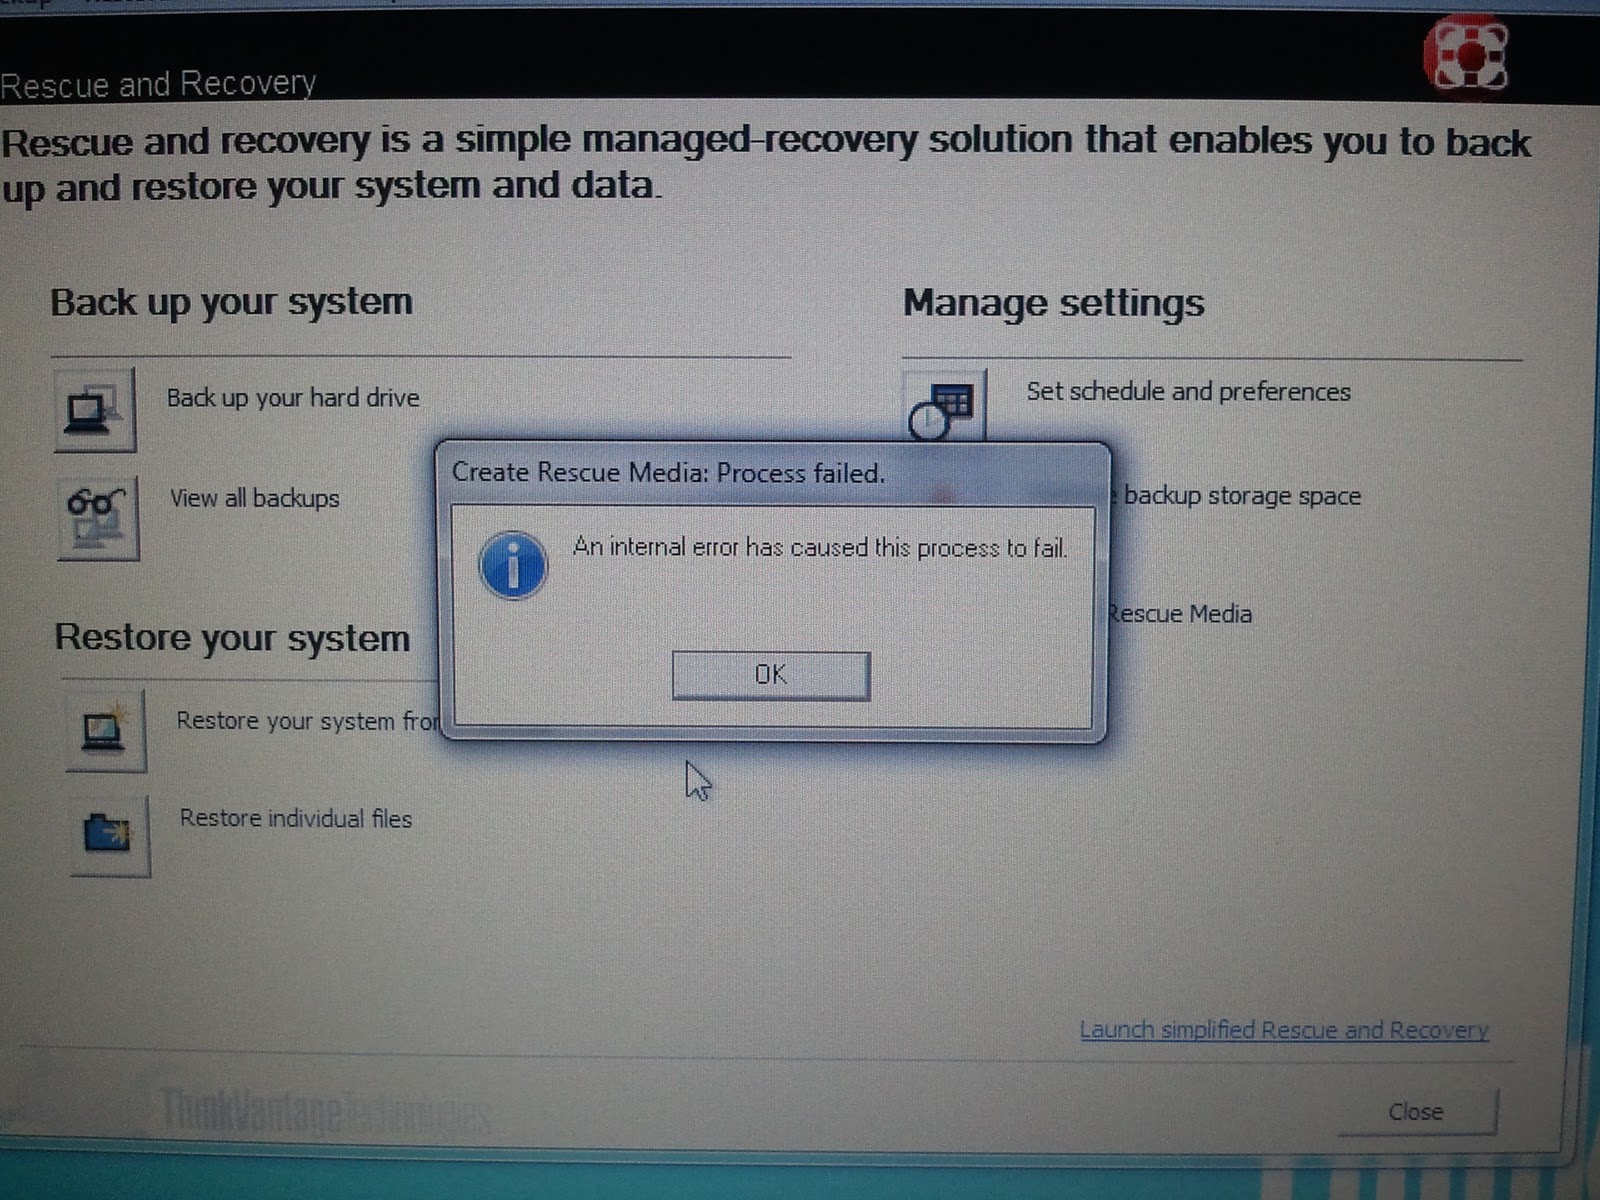
Creating recovery media fails. Classic.
I fire up R and R and find the option: Create Recovery Media. This looks more promising. I fire it up, stick in a DVD+R (still have 6 left, hopefully that’s enough..). It starts off, “extracting files”. And then stops, and fails. Apparently, in this instance, I may be able to expect Lenovo to ship me out some recovery CDs.
Not to be
So far, any reasonable, sane person would not feel very confident using Win7 on this machine. The dream probably wouldn’t be shattered, but clearly the software configuration is dysfunctional, ignoring user preferences and showing some worrying reliability issues out of the box.
Luckily, being part of an elite means that you don’t follow the masses. The throwaway software, bundled with the machine, is designed for people who don’t, won’t or can’t think. It’s also designed for those who blythely accept it, probably “because it’s safer”. Well, luckily for Windows users it must be a lot safer now that Norton is installed, regardless of your wishes! Phew!
To be
Fedora 16 live CD, running on this T420.
The alternative, as always, is to not accept what you are given. Instead, seek a better solution that you can feel confident in. For this ThinkPad T420, the better solution is GNU/Linux, Fedora 16 flavour.
The CD boots up into a “live desktop” (this doesn’t affect any data on the hard drive).
From the live desktop, you run software (e.g. Firefox) as if it were installed on your computer. On the ThinkPad, all hardware is automatically recognised and usable immediately.
From the live desktop, you have the option to install this software to your hard disc. How refreshing: choice.
I recently upgraded to Fedora 15 on my netbook (a Samsung N130). For a while I used Ubuntu 10.04 (nice and quick, reliable wireless, good battery), then 10.10 (bit slower, still reliable, reasonable battery) and then 11.04 (sadly a bit more sappy towards the battery and – subjectively- more laggy too).
But saying that, I like Ubuntu 11.04 in many ways. I think Unity is good, despite much antipathy towards it elsewhere on t’internet, and the intregration of social networking, media player, messaging and so on makes for a pretty swish experience. One problem that started plaguing it on my netbook, however, was that wireless became increasingly unreliable. Sometimes I’d have to reboot multiple times to get a conneciton to my Access Point. Connecting to wireless when coming out of standby never worked, period.
The netbook contains a Realtek RTL8192e wireless chip – a problem in Linux due to Realtek not really pushing development as proactively as possible into the Linux kernel.
So, what to do?
If you’re reading this then you’re probably thinking you have two options: 1) Struggle for an eternity to get the native Linux driver working properly, or 2) Install ndis-wrapper, download the Windows driver binaries and use that instead.
I almost swayed completely to option 2), but as if by magic I managed to get option 1) working. This was mainly thanks to this ubuntu forum post. In the post is a link to a download with the native linux RTL8192e driver files (I have taken the liberty of copying this archive and uploading here, in case that link stops working).
Here’s what I did:
In a terminal, type (as root)
# yum groupinstall “Development Tools” -y
Then, as your normal user:
# wget http://www.dirk-hoeschen.de/temp/rtl819Xe.tar.gz (or my link, above) # tar xfz rtl819Xe.tar.gz # cd rtl819Xe
Then, again as root: # ./install.sh (this step compiles the driver and loads the resultant kernel module)
Because Linux loads drivers (modules) dynamically, the device is brought up immediately.
My wireless card was then recognised and visible in Network Manager. My access point was recognised and easy to connect to. I have noticed that negotiation times are a bit longer than before, but I can confirm that after a little testing I can now put my netbook into standby, then awaken it and hey presto! my wireless reconnects automatically. This is not a fringe use case; I for one am very glad this works as it should now.
Unlike the ubuntu post, I didn’t download the latest sources to compile. I just went with the files in the archive. If you have difficulties, it may be worth investigating this – YMMV.
Although Fedora 15 was a pain to start off with, due to this issue, I found that once sorted it’s now becoming a real joy to use. The extended battery life is really something to behold too – I’m getting a 20-30% increase in operating time now (up to 4 hours instead of 3 on Ubuntu 11.04).
Hope this helps someone out there. If not, you may still want to follow some ndis-wrapper instructions – this might be a better alternative for you.
With my large hands, it must be as ergonomic and accommodating as possible.
Preferably without Windows. What’s the point of paying for something I won’t use?
Linux must work well on it.
As light & small as possible.
Given that nearly all early (pre dual core) netbooks are based on Intel’s Atom / 945 mobile chipset, most of the above criteria were already met. Ergonomically, I’d read that each netbook had its foibles, so this point was moot. The battery life was, for me, the deciding factor, which is why I chose a Samsung N130: the only model in the discounted range which ships with a 6-cell battery. In ideal circumstances, this will last 6 hours.
Order process, shipping, packing and unpacking
The Argos outlet on eBay accepted only PayPal payments, but this didn’t matter to me. The purchase process was as painless as you could expect. I ordered the unit on a Friday morning. On a Monday morning, at my office, it arrived courtesy of a cheery DHL delivery chap. No complaints so far!
The packing itself was as you’d expect: satisfactory for the job, with nothing much else to note. Unboxing the unit was a quick affair, and before long I had a shiny netbook on my desk. Considering this unit is classed as “refurbished”, I could see absolutely no defect or mark on it whatsoever. I would have been very happy were this brand new.
Plugging in, powering on, first impressions
When unpacking the device, I was impressed with the general feel of it. The plastic shell feels robust and the lid action is smooth. Instead of a clasp, the lid clamps to the base by means (I’m guessing) of a magnet arrangement, which has a lovely feel about it. Furthermore, Fedora behaves as expected, going straight into standby when the lid is closed.
The weight of the unit was good too. Before I put the battery in, that is. After that, the weight felt subjectively like it had more than doubled, which would put some people off I’d imagine. However, it’s hardly as heavy as my laptop so by my standards it’s still very light. A positive effect of the battery unit is in providing more stability while on a desk, and more resistance to the motion of closing/opening the lid. All together, it works well.
Along the front, left of the touchpad, are 5 LEDs. I question the value of having an “on” LED in addition to a “charging” LED, but these are tiny devices so power consumption is likely to be equally tiny. Besides, if unplugged, the charging LED isn’t illuminated. Again, another moot point.
The feel of the keyboard is good. There isn’t a compromise in terms of key press action, although to fit in a full QWERTY keyboard, some compromises in layout have had to take place. As you can see, the hash (#)/tilde and right square-bracket/brace keys are squashed in, but the compromise is acceptable.
Fedora installation and general usage
I use Fedora, CentOS and Red Hat in my day job, so for me it’s the architecture that I prefer due to familiarity (which, in this case, has not yet bred contempt!).
Using the usblive-creator tool in F13 on my laptop, I was able to set up a USB drive with a Fedora 12 live CD image, ready to boot and install on the netbook. I’d opted for F12 because I’ve had issues with mobile broadband on F13 that worked fine on F12, and mobility is the primary goal here. A quick change to the boot order in the BIOS and it was good to go.
I was surprised how quickly the installation completed. After having read about Atoms generally being slow processors, I’d expected an unhealthy dose of lethargy when installing the OS. The first boot wasn’t particularly tardy either (and this is running on a 160GB Toshiba hard drive with Fedora’s default encrypted LVM set up). It’s comparable to my HP laptop (2007 model) with a Turion TL-60 (@2GHz) w/4GiB RAM (@667MHz). In usage, though, it’s somewhat slower than the AMD laptop, taking considerably longer to load up Firefox (with half as many extensions, too).
As hoped, my Huawei E270 mobile broadband dongle worked straight away. I was also pleased that the webcam worked with no effort whatsoever (screenshot shows Cheese; ’nuff said)! So, what doesn’t work straight away?
Brightness controls on the keyboard. Probably fixed easily by identifying the char code generated with the keystroke and binding it to the dim/brightening function in GConf (he says, having no real clue..)
Wireless. I believe a Broadcom 4312 is under the bonnet, so this shouldn’t be a hard fix with a quick visit to linuxwireless.org.
Some things I haven’t tested yet, like monitor switching and the built-in microphone. But everything else seems to work fine.
A bit more on ergnomics
It has taken me a little while to get used to the layout of the keyboard and touchpad. A problem I am overcoming slowly is that the touchpad’s two buttons are actually a single, rocker-style button. It sits flush to the surface of the base, and this lack of tactile feel I find awkward. I often find my thumb in the wrong position, mistakenly pressing on the bottom of the touchpad rather than the left button. The pointer then jumps across the screen instead of clicking on the intended widget. A small but annoying issue.
Also, the keyboard is great to use while typing (as I do here, writing this review on the N130) but for cursor positioning it can become more tricky. Hitting CTRL-End to position the cursor at the end of some text, for example, is now CTRL-Fn-PgDn(End), given the multi-function aspect of the PgDn(End) key. Likewise, the cursor keys are just a shade on the small side. But these are minor complaints in the overall picture.
Final analysis
Taking into account the annoyances, weighing them against the needs of the many… I would have to have to award this machine 8/10. At £150 (incl VAT) + £4 postage, it has exceeded my expectations. Sure, it’s not perfect, but the price, utility and solid build get my vote. I would recommend one for a partner, friend or colleague….. maybe even a parent 😉
Oh, there is one thing about it that I couldn’t understand. There was this sticker on the top which made no sense (“Designed for Windows XP”). Surely you design an operating system for target hardware and not the other way around..? Well, regardless, I think the new location for the sticker makes much more sense. 🙂