My philosophy behind this review is not just to compare the phone directly with other Android or iOS handsets, but also to focus on what it offers, independently of those other platforms.
In other words, for what this phone and OS provide, how well do they do it..?
Unboxing & initial impressions
I ordered through ZTE’s UK-based ebay site. The phone was dispatched via the 48hr Royal Mail delivery service, which is where £5 of my £38.99 spend was allocated. This was pleasing and does confer a certain progressive philosophy of ZTE. It also means the handset + accessories cost only £33.99 including UK VAT (sales tax), which I find astonishing.
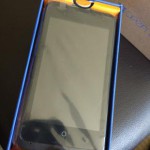
The packaging was robust and served its purpose. After removing the colourful box from its mail bag, and opening it up, there I was greeted with the phone in somewhat cheapish-looking celophane. Nevertheless, unwrapping indeed exposed the Open C as expected – not bright orange or blue, but dark and moody black – the way I like my phones!
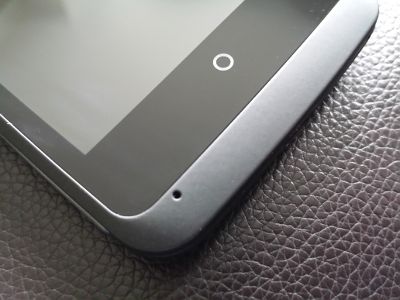
Although I was expecting the handset to feel cheap, I was actually pleasantly surprised. For its price, it feels very reasonable. The materials – including the screen – naturally are plastic, but given the feel of the plastic one expects from a stock Samsung Galaxy S4 (that is, not premium!), the Open C had a feel to it more like that of a pebble, with its soft-touch almost rubberised plastic rear cover.
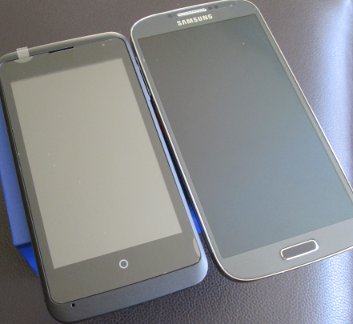
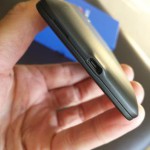
Attractive design features include the recessed ear speaker, which sits snuggly atop of the screen, and the subtle, angular curvature towards the base of the phone, which meets the centred microUSB socket smoothly and seamlessly. An iPhone 4 user I handed the device to commented on how nice in the hand it felt, and I must agree – it’s very comfortable to hold.
The compact charger and USB cable are standard fare, but the included earphones/headset are distinctly “cheap”. In this case, you get what you pay for, but this is a minor thing.

Powering on
Start-up and set-up
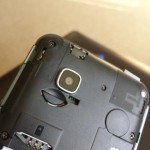
Taking the rear cover off the phone revealed the battery compartment, SIM slot and microSD slot. The battery was a very snug fit and the SIM slipped into the slot just fine. The microSD card slot wasn’t quite as reassuring, and I felt the need to double-check I’d inserted the card far enough. There are no spring-clip card slots on this phone; a clear cost-saver. But cover back on, this was no issue, and the cover feels integral to the phone once back in place.
The software set-up feature of the phone has been well covered elsewhere, so I won’t go into that here. One annoyance was that the phone couldn’t pick up my local time from any network I connected to, which I found unusual and slightly inconvenient. The UI to change date and time was slightly unintuitive but the task was soon accomplished.
Boot-up and running through this “wizard” was relatively quick and the phone was ready to use within a few minutes.
Getting contacts into the phone
The ThunderSync Add-On for Thunderbird can export your addressbook as VCard files. Although on first attempt these files were not recognised to import into the phonebook, trying again – once the phone’s set-up process had completed – yielded success. 241 VCard contacts imported perfectly.
The Import from SIM card function worked perfectly, as did the Import from Facebook feature. I didn’t try the Import from GMail feature, as I don’t store contacts there.
Considering these features are what the phone offers, I would say that it manages these tasks reasonably well, although the out-of-the-box experience was not quite as smooth as possible. It is a shame that CardDAV support wasn’t baked in too, but at least this is work in progress.
Managing contacts
A feature recognised by some Android users, and as a further plus, the Link Contacts feature allows you link an imported phonebook contact with a social media contact. In addition, the Find duplicate contacts feature allows you to easily scour the phonebook and delete or merge any identified duplicate contact records, as desired.
In fairly quick time, I was up and running with all my contacts in the address book.

Importing Media
Getting music, videos and photos on to the device is painless, thanks to its straightforward USB Mass Storage support. As an Android and Linux user, I was appalled when this transfer protocol was eschewed in favour of MTP on my Galaxy S4 – a “feature” of Jellybean+.
But back to the Open C. Controlling whether the phone’s memory or the storage card is exposed to the USB host (i.e. the connected computer) was achieved through the settings on the phone. Once connected, media transfers were effortless.
After disconnecting, simply opening up the Music player, Video player or Gallery displayed my media more or less as expected, although a 1080p mp4 video shot on the aforementioned S4 and transferred over, failed to materialise in the Video player’s file list.
Somewhat annoyingly, album art from transferred music also appears in the gallery, which seems a bit strange. To make matters worse, this same album art was not visible in the Music player for the albums to which it corresponded. Instead, I was greeted with placeholder patterns. I’m not sure how this problem is avoided, but it’s far from perfect.
In use: the User Interface & Experience
In software development, an oft-accepted maxim is that your version 1 release is basically a proof of concept. Version 2 is where you throw in lots of features, but version 3 is where it all starts knitting together well.
Given that this handset runs version 1.3, the FirefoxOS experience is acceptable. It won’t set the world on fire (no pun intended), but the key features are here – some better than others.
Performance
Coming from a Galaxy S4, I was pleased with how responsive the Open C is. On the Samsung, Touchwiz (the user interface layer on top of Android) does a wonderful job of slowing things down and adding a “treacle factor”, generally incurring an extra second or so for each major application switch.
Surprisingly, the Open C felt more nimble and less weighed-down than the S4 once I had opened 8-10 different apps on each. Granted, the apps on the S4 are more feature-rich, running on a more feature-rich operating system – and I do have quite a number of them. But it’s more powerful hardware, you always pay by way of a performance penalty for complexity in software.
On the Open C, swiping across from one home screen to another was fluid and unencumbered, and opening apps was reassuringly nippy too. Nothing felt laggy and the biggest challenge was getting used to not having a back button.
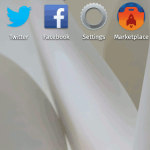
General OS Features
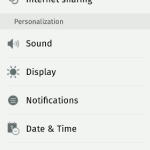
There have been many comparisons with Android here and elsewhere, but I would argue that this is a testament to the capability of FirefoxOS. The Settings area provides a reasonable number of options, from power-saving, to connectivity, SIM management and security.
Unlike Android, I didn’t feel as though options we so nested to the nth degree that I couldn’t find what I needed, quickly. This was refreshing and gave me pause for thought over just how large and burdened Android is now by its own capability. This is, after all, a phone and Mozilla have fundamentally recognised this.
Sadly, one omission is Firefox Sync. I was surprised that, being a FirefoxOS device, it doesn’t support Sync with Mozilla’s servers out-of-the-box. What a shame – this will be inconvenient to some, and argues in favour of using Firefox (the browser) on Android, instead.
Another lamentable omission is a file browser. I couldn’t see any way to browse the local file system. Hopefully this will arrive in version 2 or beyond.
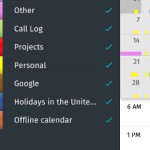
Where it does pick up the bat somewhat is with the Notes app, which seemingly offers Evernote syncing. Although I’m not an Evernote fan, I know that many people are, and this may sway some opinions. Along with CalDAV calendar sync, it goes some way towards being “cloud-friendly”, which is a nice touch for a browser-based OS… 😉
Hardware
The screen
The screen is where I have seen some criticism being levelled. Let’s clear this up: having become accustomed one of the highest-resolution (441dpi), most saturated colour displays (AMOLED) on the market, I am not offended at all by the Open C’s screen. In fact, quite the opposite. I was surprised how well text seemed to render on it and colour saturation seems average, which in my book is actually a good thing (not too saturated or too pale). At a claimed 233dpi, the resolution was workable, and the viewing angles from sides and from underneath were ok too. Viewing the screen from the phone’s top, downwards, was where it all went to hell though – everything neg’d out quite quickly.
Sound quality
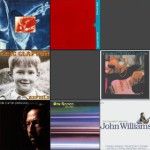
An often-overlooked area of smartphones is sound quality, via the headphone jack. Having transferred a random selection of OGG music files, I selected John Williams’ Jurassic Park theme. During listening I was very surprised that the Open C managed to dig up elements of a double bass (string instrument) in the performance. By comparison, the S4 couldn’t dredge up this particular detail.
Unfortunately, the rest of the musical quality was middling at best – brass sounded honky, strings somewhat electric and the combination of these plus percussion was a bit brash and ringing. When listening to the same track on the S4, I was greeted with a much purer, deeper soundstage with individual instruments identifiable and well placed. Timbre on the S4 was markedly improved over the Open C and generally the listening experience was superior. But still, it didn’t give me that low bass…
Whether the Firefox OS’s codec is sufficiently different to Android or whether this is hardware is, unfortunately, guess work. For general listening, say on the train for an hour, the Open C will be plenty good enough. It’s just not the last word in subtlety.
Battery life
The SIM I use for testing doesn’t have a data allowance, so I have switched off mobile data. This will have had a positive effect on battery life, but a negative effect on a fair test.
Still, despite not using the phone as heavily as normal in that regard, during testing and initial set up the screen has been on a fair bit, with WiFi connected at all times. I have seen nearly two days’ usage before needing its first re-charge, so that is encouraging. I was surprised, too, that after a night on flight-mode, the battery charge level had not shifted a dime, from 66%.
One minor issue though, is that at 10% battery remaining, the phone suddenly died and got stuck in a reboot cycle. This suggests the battery life/remaining isn’t possibly quite as accurate as it could be, although it could be argued that on its first charge, FirefoxOS hadn’t accumulated enough battery metrics to accurately predict exhaustion.
Camera
This is a tricky area to judge. This is a £34 phone. It’s difficult to buy a decent point-and-shoot camera for that price, so how does one judge this fairly?
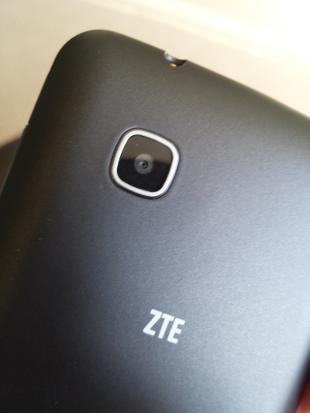
The 3.2MP sensor is mounted on the back of the phone near the top, in the customary location. There is no flash or manual/autofocus, and video recording is a rather old-school 352×288@15fps (according to GSMArena). My testing seemed to concur with that. Photos are stored as JPEGs, unless edited (in which case, for some reason they are then stored as PNGs), and videos as 3GP files.
In low-light settings, you can only expect average quality at best. Still, to the naked eye, colour accuracy could have been a lot worse.


The included software does allow some recolouring to help adjust pictures, and the Aviary app is easy to download and install, for more comprehensive off-line photo editing.
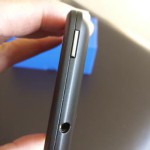
Hardware Buttons
Finally, the buttons themselves. In general use they don’t feel flimsy and give sufficient feedback. But I do question the positioning of the volume rocker and wonder if it is on the wrong side? I tend to be ambidextrous when using my phone – it goes to either ear indiscriminately. I suppose the volume rocker has to be on one side – the right hand side it is!
Summary
Considering this is a £34 phone…
- Build and general quality is better than expected
- Setting up is straightforward – although a couple of caveats:
- Importing VCard contacts from microSD card failed on first attempt, but then worked
- Plugging microUSB cable into phone didn’t have that reassuring “click”, but connection seems secure enough. (NOTE: this may have been the cable I was using; another cable did seem more secure)
- Size and thickness is very reasonable – and better than I was led to believe on some blogs/vlogs. Phone is not too bulky and has a reassuring thickness when in the hand.
- As a media device it’s fairly average, but as a phone which you won’t care about scratching up and little and using to the full, it’s great. At the price, you can forget about protective cases – just chuck it in a bag or your pocket and get on with life!
Final words
Comparing to flagship smartphones is unwarranted. It is not a flagship but an entry-level phone – so comparisons should be with Android phones at same price!
I was pleasantly surprised by the Open C. The phone hardware, at this price, is exceptionally good value. No, unless you’re incredibly limber it will not allow you to post selfies to Facebook (with no front-facing camera present), but is this a major thing?
Likewise, it’s a fairly “lightweight” experience all round: apps are less functional than their Android or iOS brethren, and the OS is less “tweakable”. But as a result, it’s swift and responsive in use, and the vast majority of software included is stable and acceptable.
As an entry-level smartphone, for £34 + £5 p&p, I find it hard to fault. If it weren’t for the stellar camera on my S4, I might consider switching to it.
A more in-depth review of FirefoxOS plus full specs on the Open C can be found at GSMArena.