Some time back, I wrote a post listing the steps required to migrate passwords stored in Chrome to Firefox.
That post was a bit convoluted, so this post is hopefully an improvement! My intention is to make this process as simple, and reliable, as possible. To succeed, you will need:
- 10 minutes
- Mozilla Firefox, with the Password Exporter add-on installed
- Google Chrome (version 53+)
- LibreOffice
There are five main steps. Let’s get started!
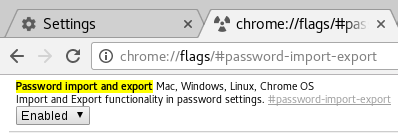
- In Chrome’s address bar, paste:
chrome://flags/#password-import-export…then hit enter.

The option in Chrome should appear like this. Enable it! In the option that is highlighted, Select Enabled and then Relaunch.
- Now, in Chrome, navigate to chrome://settings-frame/passwords, scroll down and click Export. Save the file with a .csv extension.
- Locate the CSV file and right click > Open With > LibreOffice Calc (Alternatively, start LibreOffice Calc and open the CSV file).
- Using LibreOffice Calc, you will need to modify the CSV file to import it into Firefox. Do the following:
- Right-click on row 1 and select ‘Insert Rows Above’. This should insert a single row at the top of the sheet.
- Copy the following and paste into cell A1, using Shift-Ctrl-V (to ensure you paste as plain text):
# Generated by Password Exporter; Export format 1.0.4; Encrypted: false
- You need to move one column, B, to where column D is – but we don’t want to overwrite your data!
- At the top of column B, right-click and select Cut.
- Then right-click again and select Delete Columns – this should remove the now-empty column, and shift-left columns C and D, to positions B and C.
- Now, on column D, select Paste. Your url data should now live in column D.
- Paste the following into cell A2, using Shift-Ctrl-V:
hostname username password formSubmitURL httpRealm usernameField passwordFieldWhen pasting, you may be prompted to select the data format. Select “Unformatted Text” in the list and click OK. We are ok with overwriting other cell contents, so “OK” that. Note, you may need to separate out the headings into columns, left to right.
- Finally, we’re ready to export this data! Go to the File menu, select Save As…In the Save As requester that appears, at the bottom check ‘Edit Filter’ and select ‘Text CSV (.csv)’ in the format drop-down:

Select these options to correctly export your data! - Before we get too excited, there’s just one more step to perform – some textual clean-up!Open up the exported CSV file in your favourite plain-text editor. In the first row, you may see this:
"# Generated by Password Exporter; Export format 1.0.4; Encrypted: false",,,,,,
Delete the leading ” and trailing “,,,,,, from that line.
Secondly, do a Find/Replace on double-commas (,,) making them ,””, (with two quotes inserted) instead. You may need to perform this Find/Replace twice. Now save the file again.
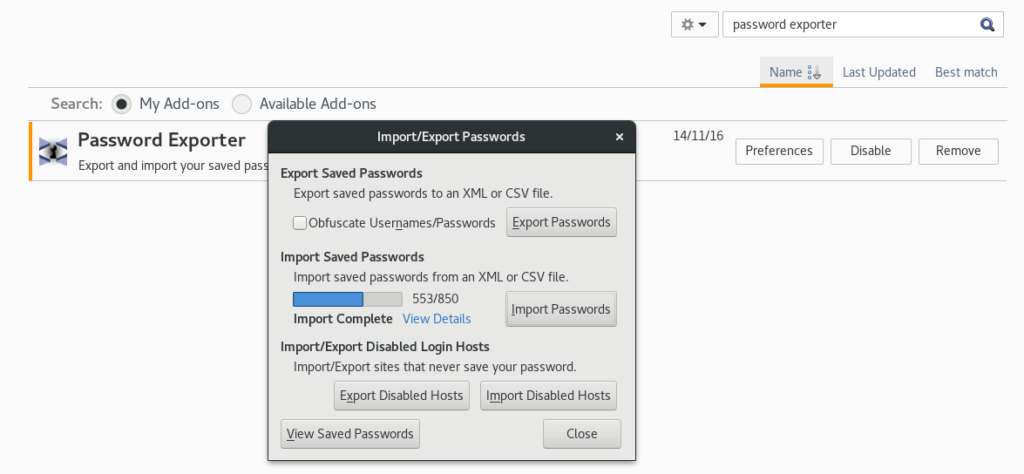
- In Firefox, click on the burger menu and select Add-ons (or just go to about:addons). Find Password Exporter and click Preferences. In the Preferences window, click Import Passwords. Now locate your saved CSV file and load it.You should finally see something like this:

Importing saved passwords into Firefox. Not easy, but definitely rewarding!