The title of this article could have been, “How to shrink a mdadm Linux RAID containing LVM Logical Volumes and replace physical disks with lower-capacity alternatives – AND keep your data safe!”.
That’s just clunky, of course, but I hope you get the point.
Preliminaries
I recently ran into the situation where I needed to reduce the size of my physical volumes on a server to allow an easier backup strategy. The data is stored across four drives, making up two separate RAID1 arrays, which are then utilised by Logical Volume Manager in Linux.
If all of this sounds overly complex, well … it perhaps is a litle. I could just store my data on two RAID1 arrays with Ext4 file systems, and not worry about LVM. However, I have long been a convert of the superior disk space management of LVM, so sitting that atop of a mdadm RAID just adds a few more steps to the process, but a lot more flexibility.
Without further ado, let’s get started!
First things, first: Do a backup.
Using RAID for storage is one thing, but it is no substitute for a proper backup. The golden rule is:
RAID provides availability; backups provide recovery.
If everyting goes south in this process, having a current backup will save the day. (I won’t divulge how many times LTO backups have saved my posterior…). In short, I fully trust LTO backups, and a tape backup strategy generally (here’s why).
The disk sizes of my two RAID arrays are 2x400GB and 2x2TB. However, the storage used on each is only 100GiB and 500GiB, respectively. Sitting on a shelf, I have:
- 2 x 250GB Seagate 7200.12 ST3250312AS drives (PDF)
- 2 x 1000GB Seagate Constellation ES ST1000NM0011 drives (PDF)
On this server, I don’t envisage my data growth exceeding about 20GB & 40GB per year, respective to the arrays, so I can safely downgrade my storage capacity and make best use of this hardware for some years to come.
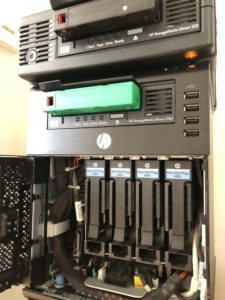
Connected to my server are two LTO tape drives: an old Ultrium 232 (100GB/200GB) drive, and a slightly younger Ultrium 1760 (800GB/1600GB) drive. The beauty of my set-up is that nearly everything is parallelised:
- Dual core CPU with dual channel memory
- 4 x SATA drive interfaces running 2 x RAID 1 arrays
- 2 x PCIe-to-SCSI host bus adapters
- 2 x SCSI tape drives, one connected to each HBA
All of this is configured within a tiny HP Microserver (PDF), excluding one of the tape drives which is an external unit. And the beauty of this parallelisation is that I can run backups from each RAID array to each tape drive at full speed, without the CPU even breaking a sweat!
For each mounted volume, I simply used the GNU dump command to back everything up on each drive:
root@stargate:/mnt/company# dump -b 64 -0u -f /dev/st0 /mnt/company/
  DUMP: Date of this level 0 dump: Thu Aug 16 15:57:06 2018
  DUMP: Dumping /dev/mapper/md0--vg-lv--company (/mnt/company) to /dev/st0
  DUMP: Label: company
  DUMP: Writing 64 Kilobyte records
  DUMP: mapping (Pass I) [regular files]
  DUMP: mapping (Pass II) [directories]
  DUMP: estimated 94061522 blocks.
  DUMP: Volume 1 started with block 1 at: Thu Aug 16 15:57:19 2018
  DUMP: dumping (Pass III) [directories]
  DUMP: dumping (Pass IV) [regular files]
  DUMP: 6.27% done at 19662 kB/s, finished in 1:14
  DUMP: 13.30% done at 20855 kB/s, finished in 1:05
  [ ... ]
  DUMP: 91.52% done at 19117 kB/s, finished in 0:06
  DUMP: 96.59% done at 18915 kB/s, finished in 0:02
  DUMP: Closing /dev/st0
  DUMP: Volume 1 completed at: Thu Aug 16 17:21:06 2018
  DUMP: Volume 1 94060544 blocks (91856.00MB)
  DUMP: Volume 1 took 1:23:47
  DUMP: Volume 1 transfer rate: 18711 kB/s
  DUMP: 94060544 blocks (91856.00MB) on 1 volume(s)
  DUMP: finished in 4974 seconds, throughput 18910 kBytes/sec
  DUMP: Date of this level 0 dump: Thu Aug 16 15:57:06 2018
  DUMP: Date this dump completed:  Thu Aug 16 17:21:06 2018
  DUMP: Average transfer rate: 18711 kB/s
  DUMP: DUMP IS DONE
root@stargate:~# dump -b 512 -0u -f /dev/st1 /mnt/archive/
  DUMP: Date of this level 0 dump: Thu Aug 16 15:59:53 2018
  DUMP: Dumping /dev/mapper/md1--vg-lv--archive (/mnt/archive) to /dev/st1
  [ ... ]
  DUMP: 3.48% done at 59490 kB/s, finished in 2:18
  DUMP: 7.98% done at 68256 kB/s, finished in 1:55
  [ ... ]
  DUMP: 512711168 blocks (500694.50MB) on 1 volume(s)
  DUMP: finished in 6143 seconds, throughput 83462 kBytes/sec
  DUMP: Date of this level 0 dump: Thu Aug 16 15:59:53 2018
  DUMP: Date this dump completed:  Thu Aug 16 17:44:01 2018
  DUMP: Average transfer rate: 82455 kB/s
  DUMP: DUMP IS DONE
The keen reader may notice that I change the block size of dump for each drive. I have found doing so reduced the disk I/O operations for each backup, which improved throughput. I had trouble using a block size of 1024KiB though, so 512KiB sufficed on the faster drive.
While 20MiB/s and 80MiB/s may be laughed at these days (and yes, it doesn’t compare with modern USB3.1 RAIDs, for example), this speed does at least allow backups to be completed within a reasonable time. And the reason I am an LTO stalwart is that media is cheaper (per GiB), and more resilient when kept in cold storage.
I should mention at this point, for anyone interested in using GNU dump/restore to manage their backups, that the software isn’t limited to addressing locally-connected tape drives. You can also backup to a local file, a file shared on a NAS server, or a remote tape drive too. The GNU dump/restore documentation is well worth investigating.
Resizing storage in Logical Volume Manager
With backups available, you could ask why I didn’t just whip out the old drives and install the new ones, create new arrays and then restore data from backup. My reason for not doing so is twofold:
- I want to keep the backup tapes pristine in case of a real, last-resort need. I am confident they store the data because of LTO’s verify-as-written approach.
- Replacing the drives one-by-one allows them to be fully exercised when the RAID arrays are rebuilt. This will test that each drive is performing reliably; any problem can be easily rectified at this stage.
The next step is to resize the logical volumes that sit on those RAID arrays. In LVM you have to work outwards, starting from the innermost point: the logical volume. Then we’ll look at the volume group, and finally the physcal volume.
Resize the logical volumes:
root@stargate:~# lvresize -L 200G -r /dev/md0-vg/lv-company
fsck from util-linux 2.25.2
company: 619459/24412160 files (0.2% non-contiguous), 24895191/97644544 blocks
resize2fs 1.42.12 (29-Aug-2014)
Resizing the filesystem on /dev/mapper/md0--vg-lv--company to 52428800 (4k) blocks.
The filesystem on /dev/mapper/md0--vg-lv--company is now 52428800 (4k) blocks long.

Size of logical volume md0-vg/lv-company changed from 372.48 GiB (95356 extents) to 200.00 GiB (51200 extents).
Logical volume lv-company successfully resized
root@stargate:~# lvresize -L 800G -r /dev/md1-vg/lv-archive
fsck from util-linux 2.25.2
archive: 2097049/108986368 files (0.1% non-contiguous), 134664369/435915776 blocks
resize2fs 1.42.12 (29-Aug-2014)
Resizing the filesystem on /dev/mapper/md1--vg-lv--archive to 209715200 (4k) blocks.
The filesystem on /dev/mapper/md1--vg-lv--archive is now 209715200 (4k) blocks long.

Size of logical volume md1-vg/lv-archive changed from 1.62 TiB (425699 extents) to 800.00 GiB (204800 extents).  Logical volume lv-archive successfully resized
Now that we’ve resized the logical volumes, let’s check the size of the volume groups:
root@stargate:~# vgs
  VG             #PV #LV #SN Attr   VSize   VFree
  md0-vg           1   1   0 wz--n- 372.48g 172.48g
  md1-vg           1   1   0 wz--n-   1.82t   1.04t
This looks good, and broadly corresponds to what we’ve done so far:
- I resized the LV on md0-vg to 200GiB, which leaves around 172.5GiB free
- I resized the LV on md1-vg to 800GB, which leaves around 1TiB free
So far, so good.
Next, we want to reduce the size of those Volume Groups to fit within the new mdadm RAID sizes. In LVM, sometimes multi-level operations are combined. One example of this is resizing a Volume Group. As there isn’t a vgresize command in lvm, we have to look at the next level out – the physical volume. For this, we use pvresize.
root@stargate:~# pvresize -v --setphysicalvolumesize 210G /dev/md0
    DEGRADED MODE. Incomplete RAID LVs will be processed.
    Using physical volume(s) on command line
    Archiving volume group "md0-vg" metadata (seqno 5).
    /dev/md0: Pretending size is 440401920 not 781156528 sectors.
    Resizing volume "/dev/md0" to 781156528 sectors.
    Resizing physical volume /dev/md0 from 0 to 53759 extents.
    Updating physical volume "/dev/md0"
    Creating volume group backup "/etc/lvm/backup/md0-vg" (seqno 6).
  Physical volume "/dev/md0" changed
  1 physical volume(s) resized / 0 physical volume(s) not resized
root@stargate:~# pvresize -v --setphysicalvolumesize 810G /dev/md1
    DEGRADED MODE. Incomplete RAID LVs will be processed.
    Using physical volume(s) on command line
    Archiving volume group "md1-vg" metadata (seqno 14).
    /dev/md1: Pretending size is 1698693120 not 3906762895 sectors.
    Resizing volume "/dev/md1" to 3906762895 sectors.
    Resizing physical volume /dev/md1 from 0 to 207359 extents.
    Updating physical volume "/dev/md1"
    Creating volume group backup "/etc/lvm/backup/md1-vg" (seqno 15).
  Physical volume "/dev/md1" changed
  1 physical volume(s) resized / 0 physical volume(s) not resized
Again, the astute reader will see that my resized capacities are slightly higher (by 10GiB) than the LVs contained within. I do this (mainly out of habit) to allow a little “wiggle room” for data, i.e. to allow safe boundaries between filesystem, LV, VG and PV. Subsequently resizing every compoment to its fullest capacity is easily done.
Checking the physical storage of data
Before we go ahead with a drive removal and replacement, we should test that the PVs (Physical Volumes) in LVM are storing data at the beginning of the allocatable region – i.e. at the beginning of the “disk”. This is accomplished quite easily:
root@stargate:~# pvdisplay --maps

  --- Physical volume ---
  PV Name               /dev/md1
  VG Name               md1-vg
  PV Size               810.00 GiB / not usable 3.00 MiB
  Allocatable           yes
  PE Size               4.00 MiB
  Total PE              207359
  Free PE               2559
  Allocated PE          204800
  PV UUID               luUdnY-3416-wh3O-8fpC-JK6B-0oM7-fbYvo4

  --- Physical Segments ---
  Physical extent 0 to 204799:
    Logical volume /dev/md1-vg/lv-archive
    Logical extents 0 to 204799
  Physical extent 204800 to 207358:
    FREE


  --- Physical volume ---
  PV Name               /dev/md0
  VG Name               md0-vg
  PV Size               210.00 GiB / not usable 3.00 MiB
  Allocatable           yes
  PE Size               4.00 MiB
  Total PE              53759
  Free PE               2559
  Allocated PE          51200
  PV UUID               Xzj831-tu43-G6cA-05LB-cccU-Tcae-dy2LqP

  --- Physical Segments ---
  Physical extent 0 to 51199:
    Logical volume /dev/md0-vg/lv-company
    Logical extents 0 to 51199
  Physical extent 51200 to 53758:
    FREE
This looks good: In LVM, each PV is allocating all of its Volume Group data at the beginning of the space.
But what about mdadm? How do we know that mdadm is storing its data at the beginning of the disks?
As it turns out, this doesn’t matter. The main thing is that need to shrink mdadm’s RAID to be the right size for the physical disks that the RAID inhabits. This is where things could get a little funky, as mdadm has no idea where LVM data is stored. Hence, the reason for a backup.
Safely shrinking the mdadm RAID
To quickly re-cap, we have:
- in md0:
- shrunk the LV and its ext4 filesystem to 200GiB
- shrunk the PV/VG to 210GiB
- in md1:
- shrunk the LV and its ext4 filesystem to 800GiB
- shrunk the PV/VG to 810GiB
According to the mdadm manual (my underlines):
For create, build, or grow:
-z, –size=
Amount (in Kibibytes) of space to use from each drive in RAID levels 1/4/5/6. This must be a multiple of the chunk size, and must leave about 128Kb of space at the end of the drive for the RAID superblock. If this is not specified (as it normally is not) the smallest drive (or partition) sets the size, though if there is a variance among the drives of greater than 1%, a warning is issued.
A suffix of ‘M’ or ‘G’ can be given to indicate Megabytes or Gigabytes respectively.
Sometimes a replacement drive can be a little smaller than the original drives though this should be minimised by IDEMA standards. Such a replacement drive will be rejected by md. To guard against this it can be useful to set the initial size slightly smaller than the smaller device with the aim that it will still be larger than any replacement.
This value can be set with —grow for RAID level 1/4/5/6 though CONTAINER based arrays such as those with IMSM metadata may not be able to support this. If the array was created with a size smaller than the currently active drives, the extra space can be accessed using —grow. The size can be given as max which means to choose the largest size that fits on all current drives.
Before reducing the size of the array (with —grow –size=) you should make sure that space isn’t needed. If the device holds a filesystem, you would need to resize the filesystem to use less space.
After reducing the array size you should check that the data stored in the device is still available. If the device holds a filesystem, then an ‘fsck’ of the filesystem is a minimum requirement. If there are problems the array can be made bigger again with no loss with another
—grow –size= command.
Before we start the mdadm resize operation, we’ll do a little filesystem check to ensure our data is ok:
root@stargate:~# fsck.ext4 -f /dev/md0-vg/lv-company
e2fsck 1.42.12 (29-Aug-2014)
Pass 1: Checking inodes, blocks, and sizes
Pass 2: Checking directory structure
Pass 3: Checking directory connectivity
Pass 4: Checking reference counts
Pass 5: Checking group summary information
company: 619459/13107200 files (0.3% non-contiguous), 24184088/52428800 blocks

root@stargate:~# fsck.ext4 -f /dev/md1-vg/lv-archive
e2fsck 1.42.12 (29-Aug-2014)
Pass 1: Checking inodes, blocks, and sizes
Pass 2: Checking directory structure
Pass 3: Checking directory connectivity
Pass 4: Checking reference counts
Pass 5: Checking group summary information
archive: 2097049/52428800 files (0.1% non-contiguous), 131114698/209715200 blocks
All good. To ensure no data gets written to our VGs while the mdadm “grow” (shrink) process proceeds, we should now disable the VGs:
root@stargate:~# vgchange -an md0-vg
  0 logical volume(s) in volume group "md0-vg" now active
root@stargate:~# vgchange -an md1-vg
  0 logical volume(s) in volume group "md1-vg" now active
As an interesting exercise in maximising data protection, I also decided to “fail” one drive on each array before attempting the resize. This means that should the resize not work, and fsck reports file system errors, I can recover the RAID and re-think my options.
For md0 the drives are /dev/sdb1 and /dev/sdc1. Let’s go ahead and “fail” one:
root@stargate:~# mdadm /dev/md0 -f /dev/sdb1
mdadm: set /dev/sdb1 faulty in /dev/md0
Nothing more to do now but “byte the bullet” (sorry about that). Let’s try the resize:
root@stargate:~# mdadm --grow /dev/md0 --size=220G
mdadm: component size of /dev/md0 has been set to 230686720K
unfreeze
Now let’s now check that filesystem:
root@stargate:~# vgchange -ay md0-vg
  1 logical volume(s) in volume group "md0-vg" now active

root@stargate:~# fsck.ext4 -f /dev/md0-vg/lv-company
e2fsck 1.42.12 (29-Aug-2014)
Pass 1: Checking inodes, blocks, and sizes
Pass 2: Checking directory structure
Pass 3: Checking directory connectivity
Pass 4: Checking reference counts
Pass 5: Checking group summary information
company: 619459/13107200 files (0.3% non-contiguous), 24184088/52428800 blocks
This looks encouraging. Let’s try this process on the second array:
root@stargate:~# mdadm /dev/md1 -f /dev/sdd1
mdadm: set /dev/sdd1 faulty in /dev/md1

root@stargate:~# mdadm --grow /dev/md1 --size=820G
mdadm: component size of /dev/md1 has been set to 859832320K
unfreeze

root@stargate:~# vgchange -ay md1-vg
  1 logical volume(s) in volume group "md1-vg" now active

root@stargate:~# fsck.ext4 -f /dev/md1-vg/lv-archive
e2fsck 1.42.12 (29-Aug-2014)
Pass 1: Checking inodes, blocks, and sizes
Pass 2: Checking directory structure
Pass 3: Checking directory connectivity
Pass 4: Checking reference counts
Pass 5: Checking group summary information
archive: 2097049/52428800 files (0.1% non-contiguous), 131114698/209715200 blocks
Fantastic! fsck reports identical figures after our mdadm resizing.
The next step is to remove the physical drives and replace them with smaller versions.
Physical drive removal & replacement
Before physically removing two drives from the server, we need to tell mdadm that the drives are to be removed:
root@stargate:~# mdadm /dev/md0 -r /dev/sdb1
mdadm: hot removed /dev/sdb1 from /dev/md0

root@stargate:~# mdadm /dev/md1 -r /dev/sdd1
mdadm: hot removed /dev/sdd1 from /dev/md1
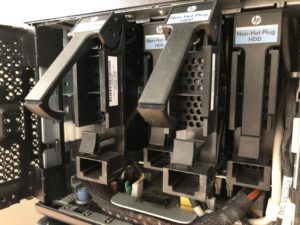
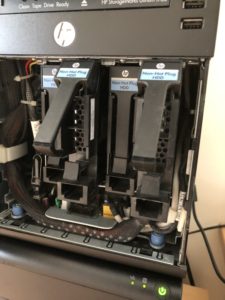
Now we shutdown the server and physically remove the drives (my server doesn’t support actual, physical hot-swapping of drives). Be careful how you handle hot-swapping on your machine if it purpotedly does support this – do read the system documentation.
And this is where my first problem occurred. On reboot, the mdadm arrays didn’t assemble and start. I think this may have been due to a rogue entry in /etc/fstab which dumped me into the maintenance terminal at start-up. Luckily, all this was easily resolved, and issuing this:
root@stargate:~# mdadm -A /dev/md0 /dev/sdc1
mdadm: /dev/md0 has been started with 1 drive (out of 2).
brought the mdadm RAID back to life.
Now that the drives are replaced, and the RAID is running, we quickly need to partition the new drives, which will then be ready for syncing into the RAID arrays. I used fdisk to create a GPT partitioning scheme, created a partition, then set the partition type to Linux RAID.
Now that’s done, I could add the new partition to the array and let the syncing commence, and check its progress with cat:
root@stargate:~# mdadm /dev/md0 -a /dev/sdb1
mdadm: added /dev/sdb1

root@stargate:~# cat /proc/mdstat
Personalities : [raid1]
md0 : active raid1 sdb1[2] sdc1[3]
      230686720 blocks super 1.2 [2/1] [_U]
      [>....................]  recovery =  0.0% (32512/230686720) finish=236.3min speed=16256K/sec
      bitmap: 1/2 pages [4KB], 65536KB chunk
That’s promising, so here goes for the second array:
root@stargate:~# mdadm -A /dev/md1 /dev/sde1
mdadm: /dev/md1 has been started with 1 drive (out of 2).

root@stargate:~# mdadm /dev/md1 -a /dev/sdd1
mdadm: added /dev/sdd1

root@stargate:~# cat /proc/mdstat
Personalities : [raid1]
md1 : active raid1 sdd1[3] sde1[2]
      859832320 blocks super 1.2 [2/1] [_U]
      [>....................]  recovery =  0.0% (344384/859832320) finish=124.7min speed=114794K/sec
      bitmap: 2/7 pages [8KB], 65536KB chunk

[ snip ]
Great stuff! Now the long wait, until the first round of syncing has completed.
Time to take the dog for a walk and enjoy a cup of tea aftwards (or, in reality, work on other stuff).
Wash, rinse, repeat: adding the second set of disks
After the syncing completed, I could add the second set of replacement disks to the array.
It’s the same process as before:
- citing the partitions of the drives to be replaced, set each RAID member to ‘faulty’
- then ‘hot-remove’ each drive
- physically shut down the server, remove and replace the hard disks
- boot up, partition the drives, then add them to the array:
root@stargate:~# mdadm /dev/md0 -a /dev/sdc1
mdadm: added /dev/sdc1

root@stargate:~# mdadm /dev/md1 -a /dev/sde1
mdadm: added /dev/sde1

root@stargate:~# cat /proc/mdstat
Personalities : [raid1]
md1 : active raid1 sde1[2] sdd1[3]
      859832320 blocks super 1.2 [2/1] [U_]
      [>....................]  recovery =  0.0% (424832/859832320) finish=168.5min speed=84966K/sec
      bitmap: 0/7 pages [0KB], 65536KB chunk

md0 : active raid1 sdc1[3] sdb1[2]
      230686720 blocks super 1.2 [2/1] [U_]
      [>....................]  recovery =  0.7% (1683968/230686720) finish=38.5min speed=99056K/sec
      bitmap: 0/2 pages [0KB], 65536KB chunk

unused devices: <none>
Finalising the storage size
Now that the sync is complete, it’s time to check the volumes’ filesystems one more time:
root@stargate:~# fsck.ext4 -f /dev/md0-vg/lv-company
e2fsck 1.42.12 (29-Aug-2014)
Pass 1: Checking inodes, blocks, and sizes
Pass 2: Checking directory structure
Pass 3: Checking directory connectivity
Pass 4: Checking reference counts
Pass 5: Checking group summary information
company: 619459/13107200 files (0.3% non-contiguous), 24184088/52428800 blocks

root@stargate:~# fsck.ext4 -f /dev/md1-vg/lv-archive
e2fsck 1.42.12 (29-Aug-2014)
Pass 1: Checking inodes, blocks, and sizes
Pass 2: Checking directory structure
Pass 3: Checking directory connectivity
Pass 4: Checking reference counts
Pass 5: Checking group summary information
archive: 2097049/52428800 files (0.1% non-contiguous), 131114698/209715200 blocks
Great – those figures still look consistent with our previous checks. With that done, we can maximise the available storage. This is what we have:
root@stargate:~# lvs

  LV         VG             Attr       LSize
  lv-company md0-vg         -wi-a----- 200.00g
  lv-archive md1-vg         -wi-a----- 800.00g
Now let’s get to work. First, increase the size of the mdadm RAIDs:
root@stargate:~# mdadm --grow /dev/md0 --size=max
mdadm: component size of /dev/md0 has been set to 244066471K
unfreeze

root@stargate:~# mdadm --grow /dev/md1 --size=max
mdadm: component size of /dev/md1 has been set to 976630471K
unfreeze
Now let’s grow the Physical Volumes (PVs) of lvm:
root@stargate:~# pvresize /dev/md0
  Physical volume "/dev/md0" changed
  1 physical volume(s) resized / 0 physical volume(s) not resized

root@stargate:~# pvresize /dev/md1
  Physical volume "/dev/md1" changed
  1 physical volume(s) resized / 0 physical volume(s) not resized
And finally, let’s grow those Logical Volumes, with a filesystem resize of course 😉 :
root@stargate:~# lvresize -l +100%FREE -r md0-vg/lv-company
fsck from util-linux 2.25.2
company: clean, 619459/13107200 files, 24184088/52428800 blocks
  Size of logical volume md0-vg/lv-company changed from 200.00 GiB (51200 extents) to 232.76 GiB (59586 extents).
  Logical volume lv-company successfully resized
resize2fs 1.42.12 (29-Aug-2014)
Resizing the filesystem on /dev/mapper/md0--vg-lv--company to 61016064 (4k) blocks.
The filesystem on /dev/mapper/md0--vg-lv--company is now 61016064 (4k) blocks long.

root@stargate:~# lvresize -l +100%FREE -r md1-vg/lv-archive
fsck from util-linux 2.25.2
archive: clean, 2097049/52428800 files, 131114698/209715200 blocks
  Size of logical volume md1-vg/lv-archive changed from 800.00 GiB (204800 extents) to 931.38 GiB (238434 extents).
  Logical volume lv-archive successfully resized
resize2fs 1.42.12 (29-Aug-2014)
Resizing the filesystem on /dev/mapper/md1--vg-lv--archive to 244156416 (4k) blocks.
The filesystem on /dev/mapper/md1--vg-lv--archive is now 244156416 (4k) blocks long.
Finally, time to mount the file systems:
root@stargate:~# df -h
Filesystem                        Size  Used Avail Use% Mounted on
/dev/mapper/md0--vg-lv--company   229G   89G  130G  41% /mnt/company
/dev/mapper/md1--vg-lv--archive   917G  488G  388G  56% /mnt/archive
If things go wrong…
The main worry is loss of data, so this short section is dedicated to restoring backups from tape. If you have run into trouble and need to restore from backup, restore is the command you need! Bear in mind that when using it, if you (like me, above) used a non-standard block size when dumping, you need to specify that again when restoring.
The -i option in this example would invoke an interactive session in restore, allowing you to select which directories and files to restore. Instead, by omitting that option, you would just restore the entire backup.
root@stargate:~# restore -i -b 64 -f /dev/st0
Closing thoughts
The GNU/Linux operating system provides some amazing storage management tools. LVM is a real joy to use; it makes hard stuff very simple to achieve. Sure, there’s a learning curve, but it’s one I’m forever glad I embraced.
I would genuinely be interested what equivalents to this power and flexibility exist in the Windows world. Not saying for a moment that none do; I’m sure they do. But the use-case for shrinking storage might be questionned, and rightly so. It’s uncommon, to say the least.
But this is where free, open source software shines – in “scratching that itch” that isn’t commonplace, or easy to achieve. And for my efforts, at least, I have gained 2 x 400GB drives, and 2 x 2TB drives, for my next project…
If you have had similar fun on your set up, or run into pitfalls with this type of approach, do leave a comment.
What kind of storage challenges have you experienced, that were (or weren’t) solved in Linux? Leave a link to your story, or a comment, below!