I confess: this is a problem without an obvious solution.
As a server administrator managing tens, possibly hundreds, of domains via Parallels’ Plesk control panel system, you may be forgiven for getting frustrated, from time to time. It happens.
While Plesk is a big time-saver for many tasks, there are occasional quirks which only help to irritate. One of these being SSL certificates.
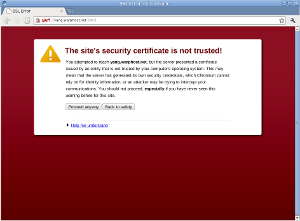 |
| Security warning in Chromium |
The Plesk control panel comes with a standard SSL certificate which is used to encrypt all HTTPS connections to/from the server by default. Most server administrators will probably want to replace this with a certificate that correctly identifies their specific server.
The usual route, through Plesk 9.5.x would be to log in, click Settings, click SSL Certificates, and then create / delete certificates accordingly until you have a new default server certificate. The final step would be to tick the checkbox next to the new default certificate and click “Secure Control Panel”.
This gives you the impression that the new certificate is now used by the control panel. It isn’t.
So, the next morning, you’ll probably receive one of these by email:
################# SSL Certificate Warning ################

 Certificate for hostname 'plesk', in file:
    /etc/httpd/conf/httpd.pem

 The certificate needs to be renewed; this can be done
 using the 'genkey' program.

 Browsers will not be able to correctly connect to this
 web site using SSL until the certificate is renewed.

 ##########################################################
                                 Generated by certwatch(1)
"Hmm", you think, "this should have been updated when I 'Secured the Control Panel'". Yes, it should. So, the next logical step would be to edit httpd.pem and replace the Key and Certificate values of this file with those displayed through Plesk's SSL Certificates section. Then simply restart the web server. Ha ha! Fail! Browsing to the control panel still results in the security warning. What gives?!!
After you have restarted the web server many times, both via the operating system's /etc/init.d method and via /usr/local/psa/admin/bin/websrvmng, you conclude that, actually, this is also not the certificate that requires updating. So, which certificate file stored on the system is the one being served by Plesk?
Good question. While you're searching for an answer, try checking/editing /usr/local/psa/admin/conf/httpsd.pem and /usr/local/psa/etc/httpsd.pem. Nope?
Oh well, how about just resorting to a reboot and taking down everyone's services for a moment? ... Not ideal, but it works. But this is not the right way!!! :-(
********* UPDATE 23/11/2011 ***********
I have stumbled upon the right way to do this. In a shell:
cd /usr/local/psa/etc/
mv httpsd.pem httpsd.pem.old
cp /usr/local/psa/admin/conf/httpsd.pem .
service psa restart
Dude!!! Thanks!!! Although in my case I had to change /usr/local/psa/etc/httpsd.pem to get it to work, pointing me to this locations was invaluable!!! THANKS! I have spent soooo much time to get this to work!
Having just one reply like yours is very rewarding. Glad this helped a little! 🙂
I have a question, that may be related. I’ve installed a cert on my plesk 10.4 server that points to a domain hosted on that server. It seems to be that some versions of IE pull the default plesk SSL cert instead of the one installed for the domain itself. Would this be related?
Hi Dave, thanks for your question.
One thing I’ve noticed about IE over the years is that it’s quite clingy with its cache. It may be that the older certificate is cached (although this would be somewhat irregular as SSL content shouldn’t really be cached).
Depending on how you installed the certificate, the CSR, Private Key, Certificate and CA certificate info should be all available under the certificate you uploaded into Domains > domain.com > SSL Certificates.
Try this: In Plesk’s main menu, go to Settings > SSL Certificates and add the new certificate info there. Set it as the default and, optionally, hit the Secure Panel link, to set it up as the panel’s certificate.
The next step is to change which certificate was used by default on the IP address, so change this in the drop down in Settings > IP Addresses >
Finally, to check that the certificate is set as the site’s default, visit Domains > domain.com > Web Hosting Settings.
Hope this helps!
That should be Settings > IP Addresses > Your-IP-Address.
I previously enclosed Your-IP-Address in angle brackets which, of course, get treated like a weird HTML tag – i.e. ignored!